Visual Reference
Visual Manual
Complete visual guide to every panel, button, and action in OpenSkyLab. Screenshots are captured from the running application with Playwright and refreshed periodically against the current UI — if you spot one that's drifted from what you see in the app, it's due for a re-capture.
Table of Contents
Setup Wizard
Welcome Screen
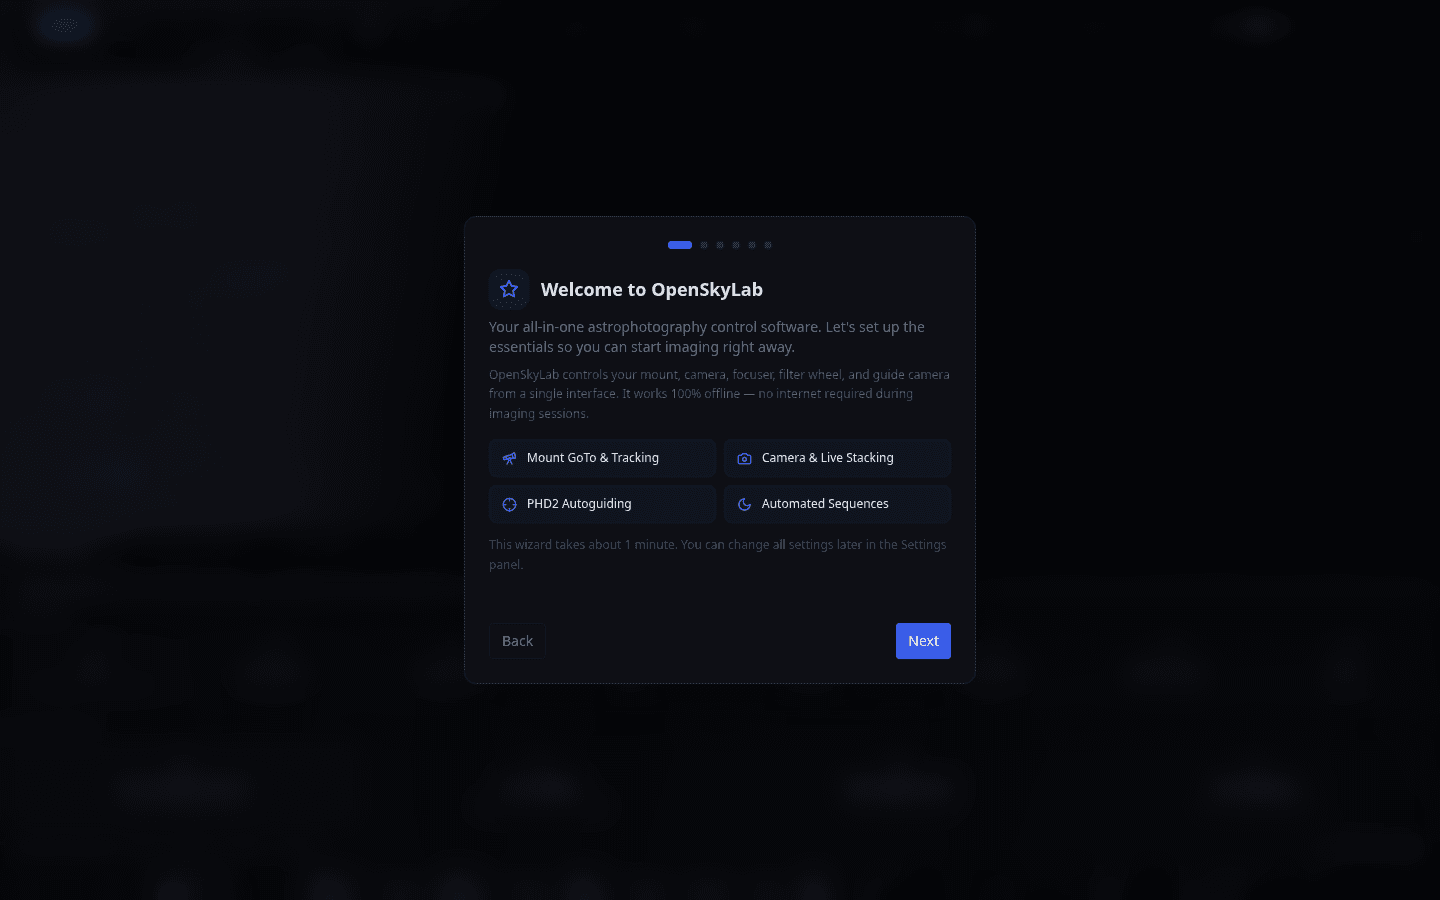
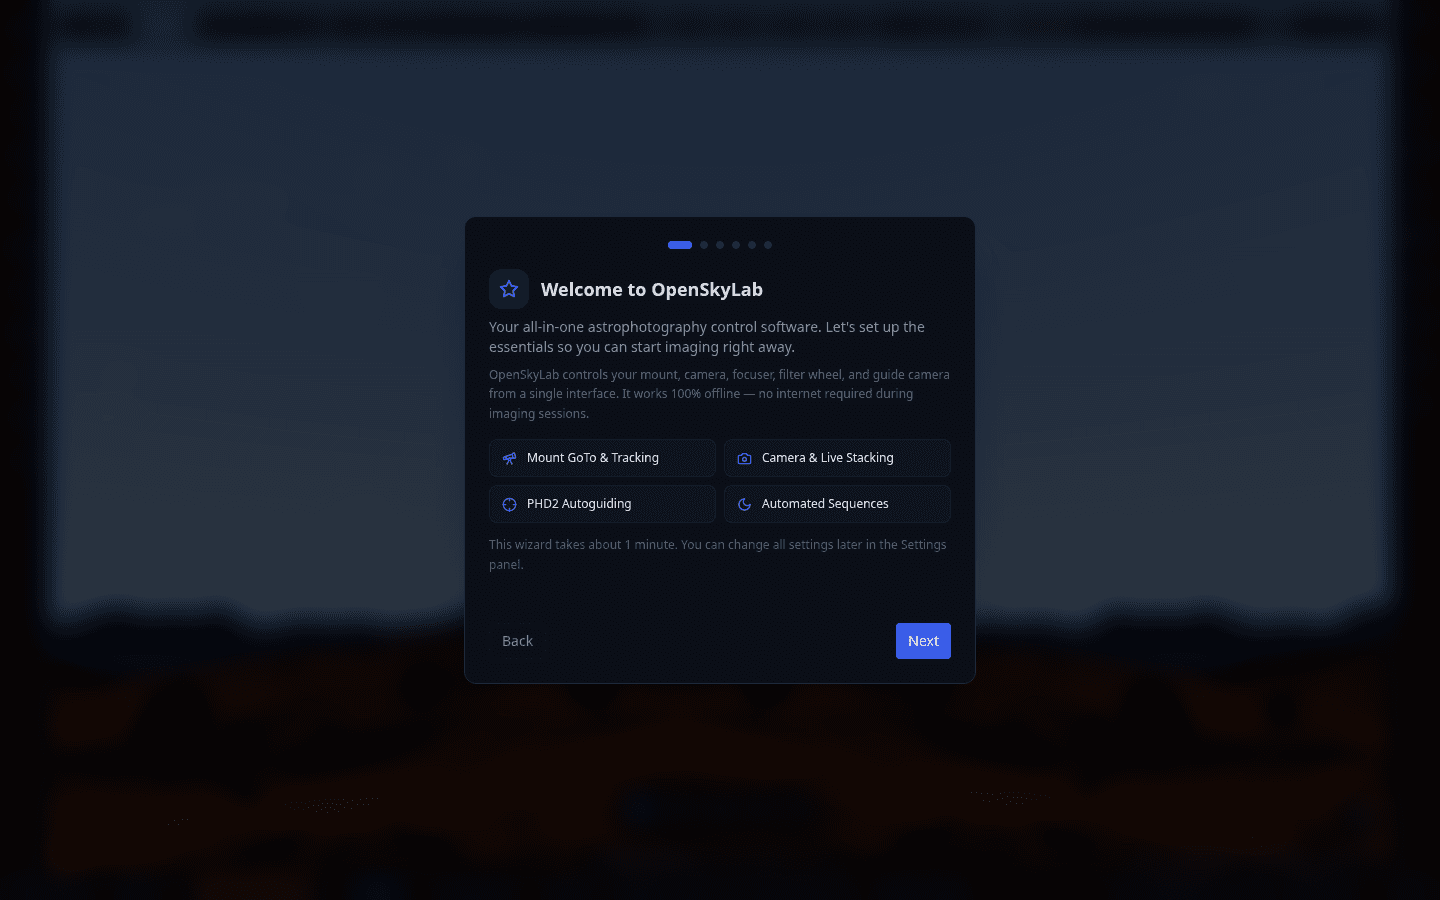
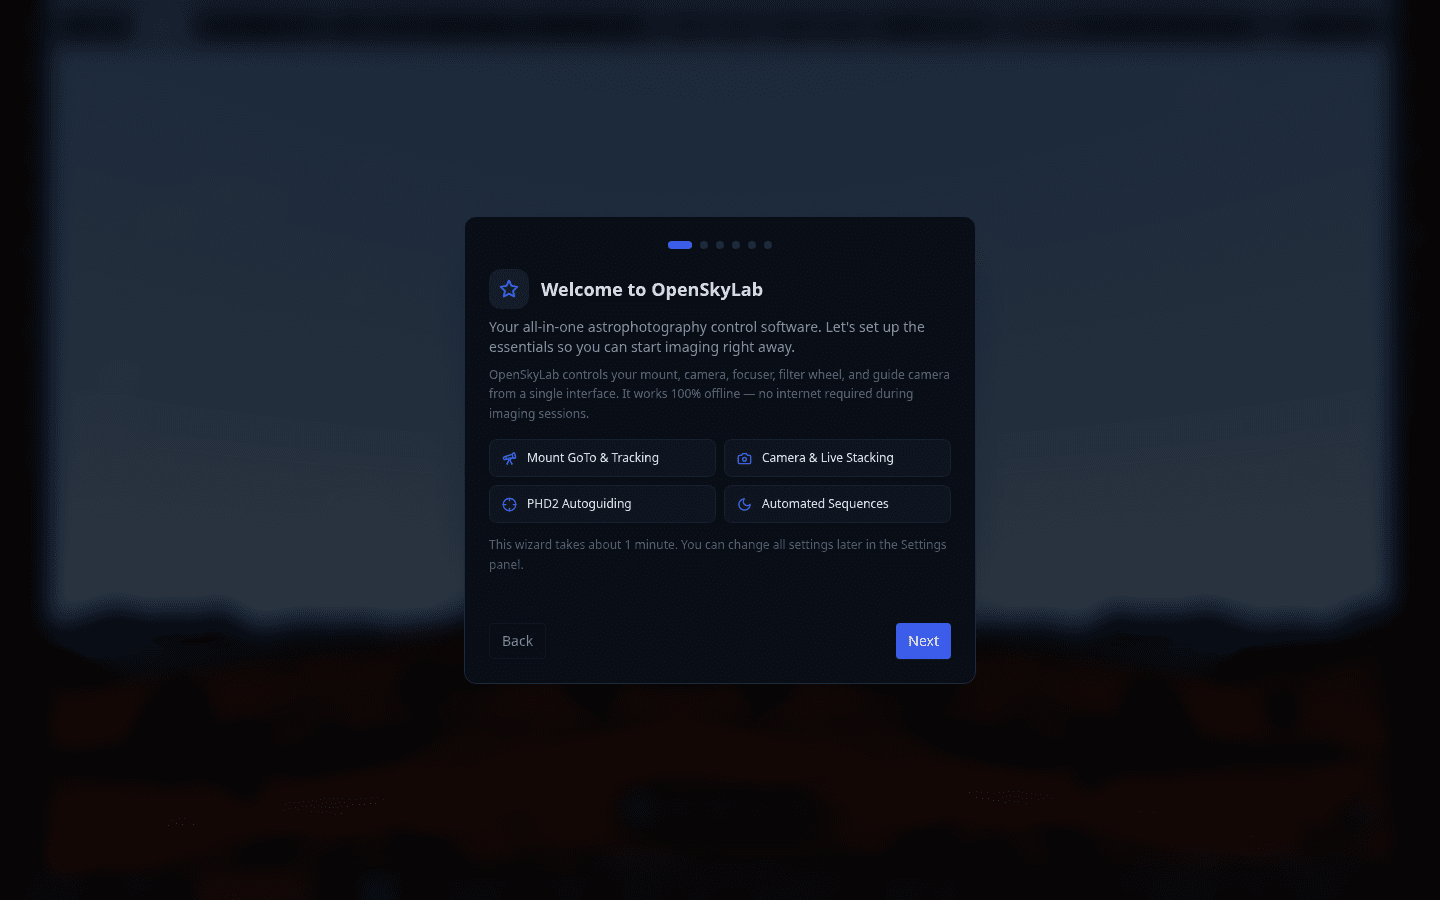
The first screen you see when launching OpenSkyLab. It introduces the four core capabilities: Mount GoTo & Tracking, Camera & Live Stacking, PHD2 Autoguiding, and Automated Sequences. Click Next to begin the quick setup.
Location & Timezone
Set your geographic coordinates and timezone. This is essential for accurate sky map rendering, GoTo calculations, object rise/set times, and scheduler planning. You can enter coordinates manually or use auto-detection.
Equipment Profile
Configure your telescope, camera, and accessories. Select your mount type, main camera, guide camera, focuser, and filter wheel. Equipment profiles can be saved and switched between different setups.
Connection Settings
Configure the connection to your equipment driver. If your INDI server runs on the same machine, keep the default localhost:7625. For remote setups (e.g., a mini-PC on the telescope), enter the remote IP address. Simulator Mode creates virtual devices for learning the interface.
All Set!
Review your settings summary before starting. Shows the selected language and driver mode. Click through to enter the main application — the interactive sky map.
Sky Map & Docking Shell
Sky Map — the home screen
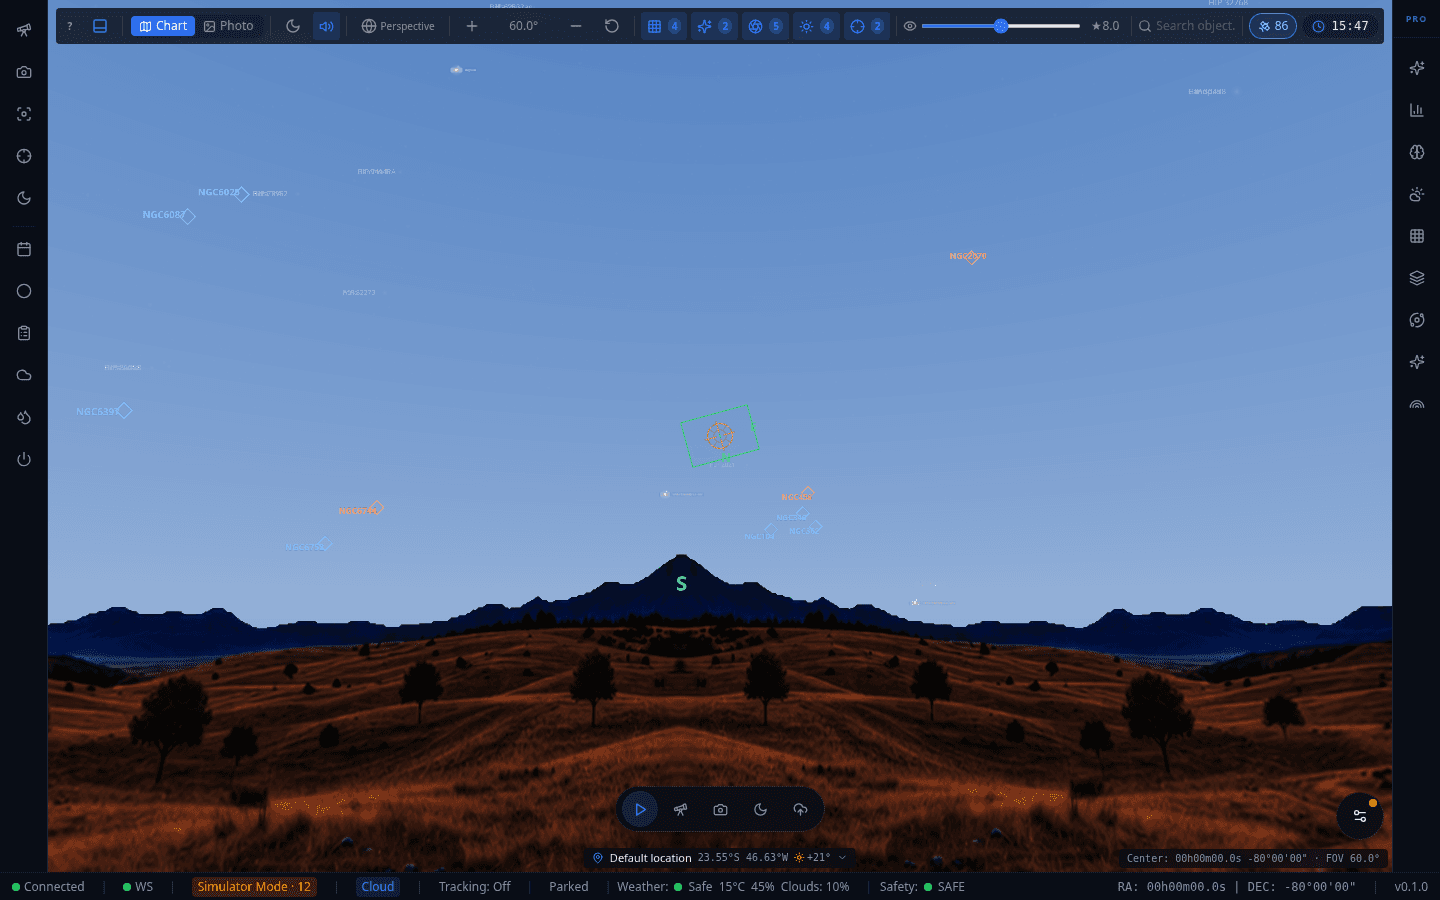
The interactive 3D sky map is the app's home screen, not a tab among others. It renders stars, deep-sky objects, constellations, planets, and the Milky Way against a ground/atmosphere horizon, with your telescope's live field-of-view overlay. All panels dock around this view rather than replacing it.
Sky Map Toolbar
Top toolbar with rendering mode (Chart/Photo), night-mode red filter, sound toggle, perspective/orthographic projection, zoom, grid/overlay/deep-sky/solar-system/mount display filters, magnitude limit, satellite & body count, time travel, and current location.

Floating Quick Actions
A persistent pill floating over the sky map with the four most common actions: Start Imaging Session, Go To Object, Take Single Frame, and Run Sequence. Replaces the old Dashboard's quick-action cards — these actions open the relevant panel directly rather than a separate screen.

Status Bar
Bottom status bar showing connection state, WebSocket status, Simulator Mode indicator with active device count, Cloud sync status, tracking/park state, weather conditions, safety status, and live RA/DEC coordinates.

Docking Rail
The left icon rail is the docking system's home base — every free-tier panel (Mount, Camera, Focuser, Guiding, Sequencer, Scheduler, Dome, Session, Dew Heater, Switches) lives here by default. Panels can be dragged to the footer or popped into a floating window; a mirrored rail on the right hosts Pro plugins.

Core Panels
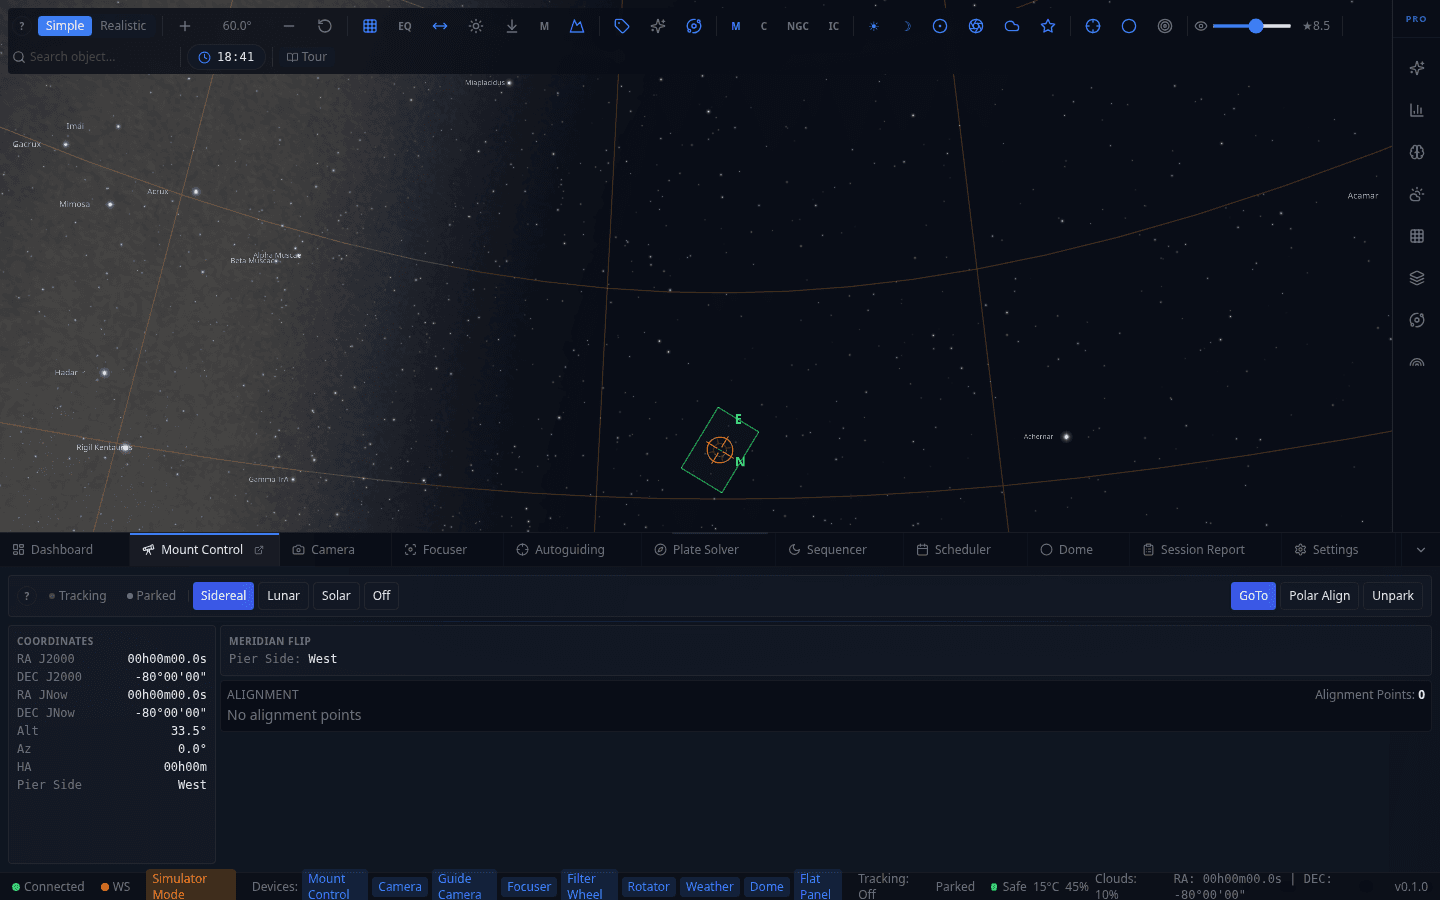
Mount Control
GoTo, Unpark, and Abort controls; tracking rate (Sidereal/Lunar/Solar/Off); live J2000 and JNow coordinates, altitude/azimuth, hour angle, and pier side; meridian flip status; and Polar Alignment access with alignment point count.
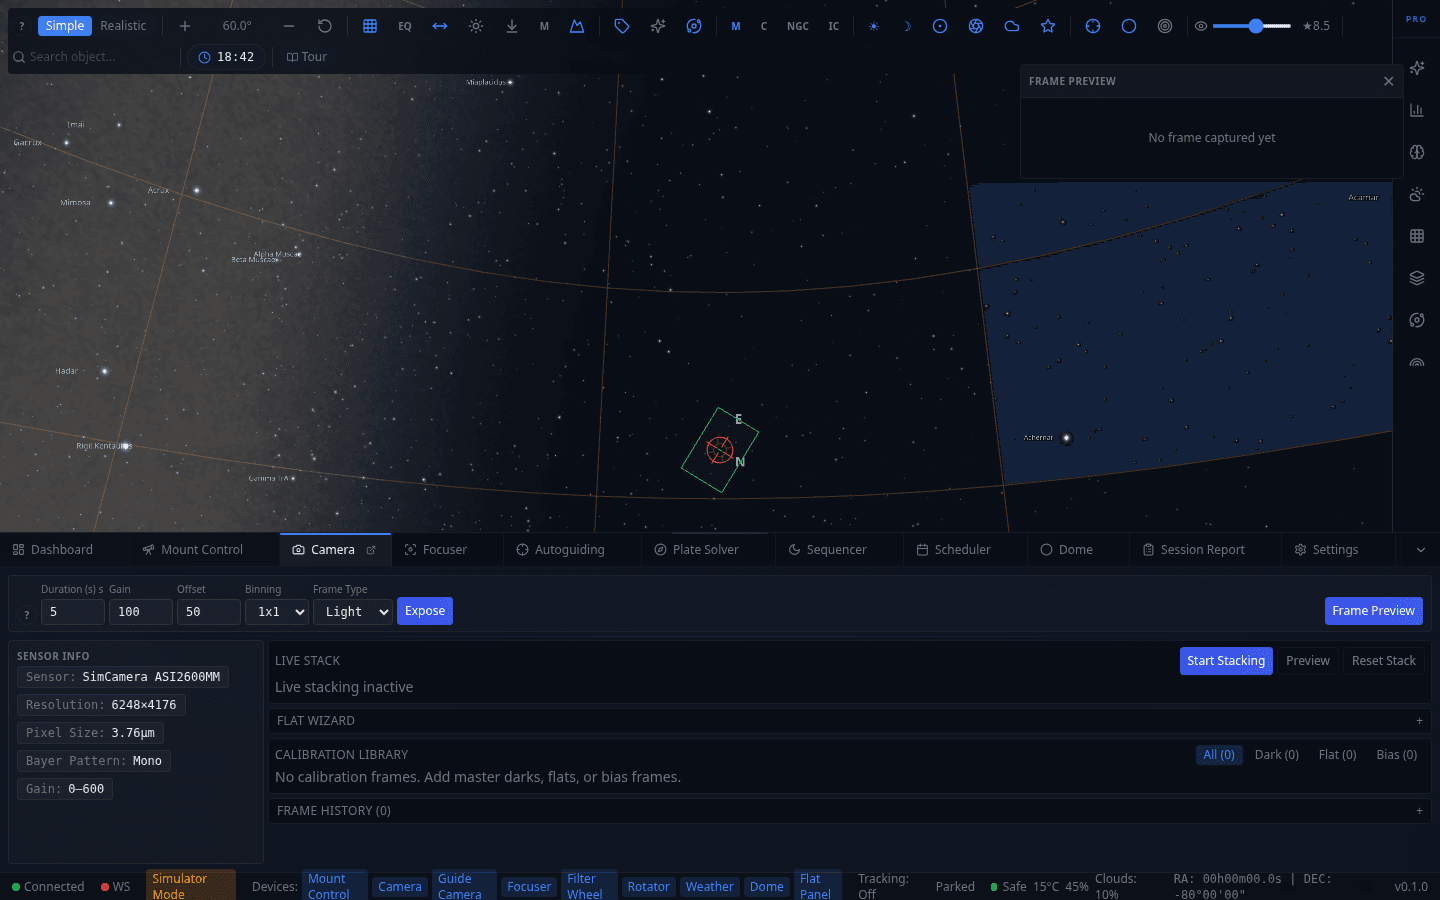
Camera Panel
Exposure controls (duration, gain, offset, binning, frame type) and sensor info at the top. Below, collapsible sections for Cooler Controls, Live Stack, Plate Solver (Sync / Correct to Target — merged into Camera from the old standalone Solver panel), Manual Solve, Flat Wizard, Calibration Library, Session Stats, and Frame History.
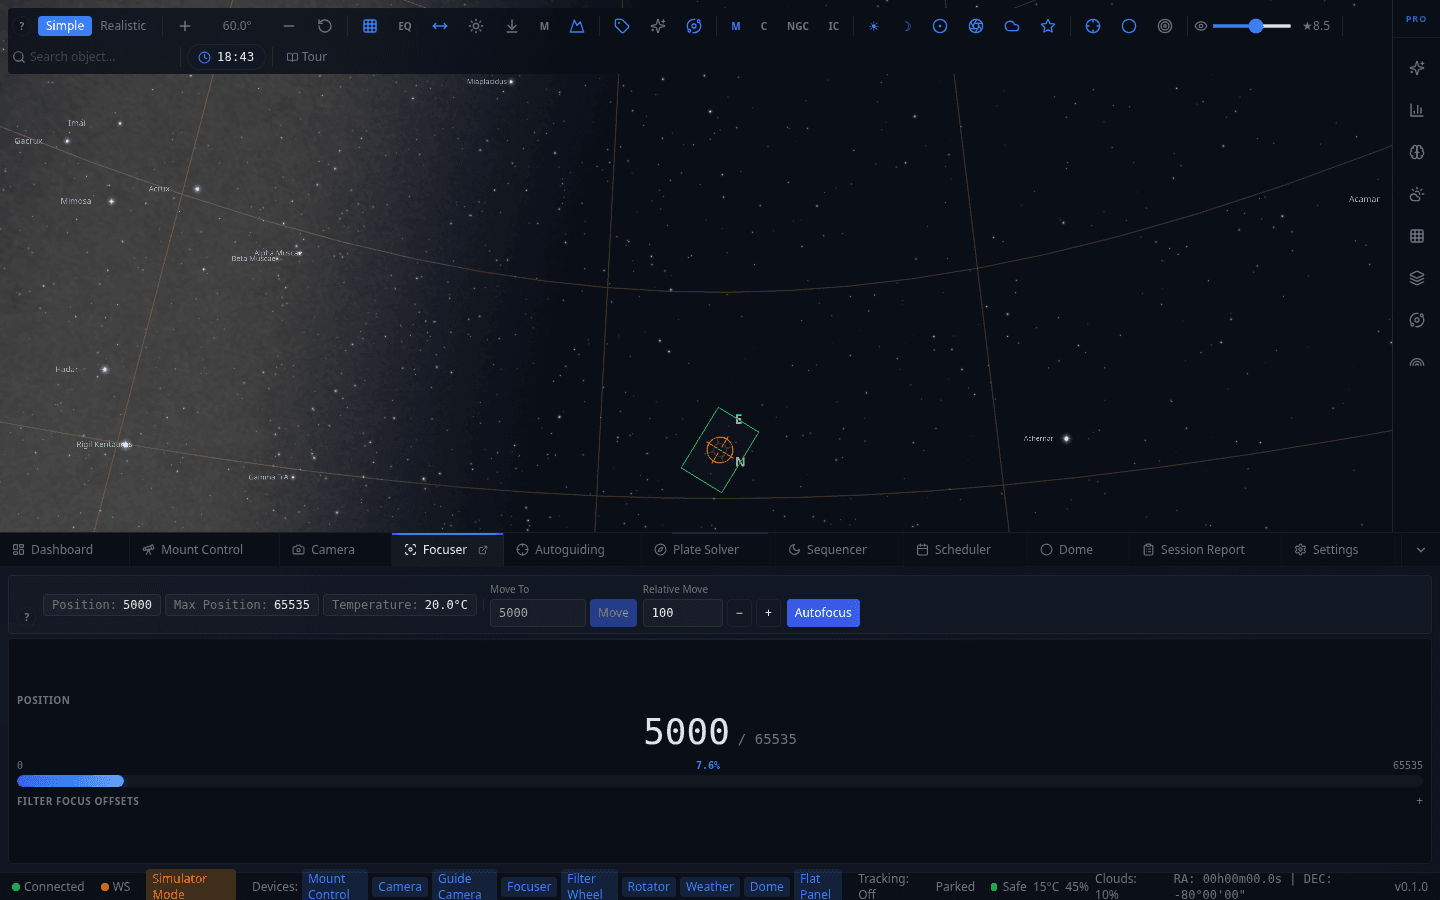
Focuser Panel
Focuser control with absolute position readout, step-based movement, and temperature compensation. Autofocus routine with V-curve analysis and configurable step size.
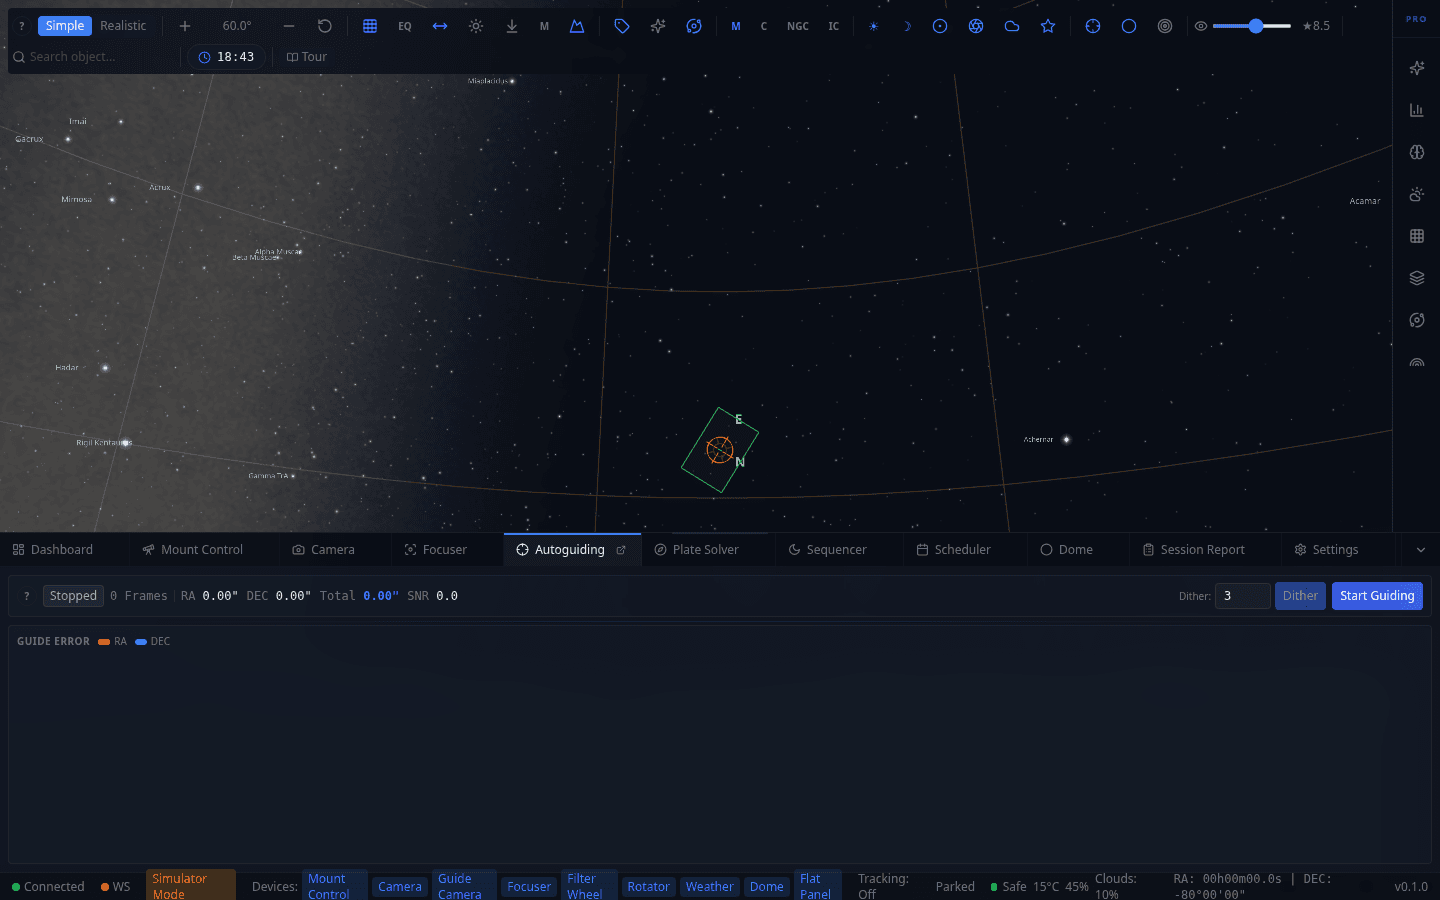
Autoguiding Panel
PHD2 autoguiding integration: start/stop, dither setting, live RA/DEC/RMS/SNR/frame-count readout, and a guide-error chart plotting RA and DEC error over time.
Sequencer
Capture sequence editor for automated imaging, with saved sequences listed and a template browser for reusable configurations. Supports multi-target sequences with conditions, triggers, and nested loops.
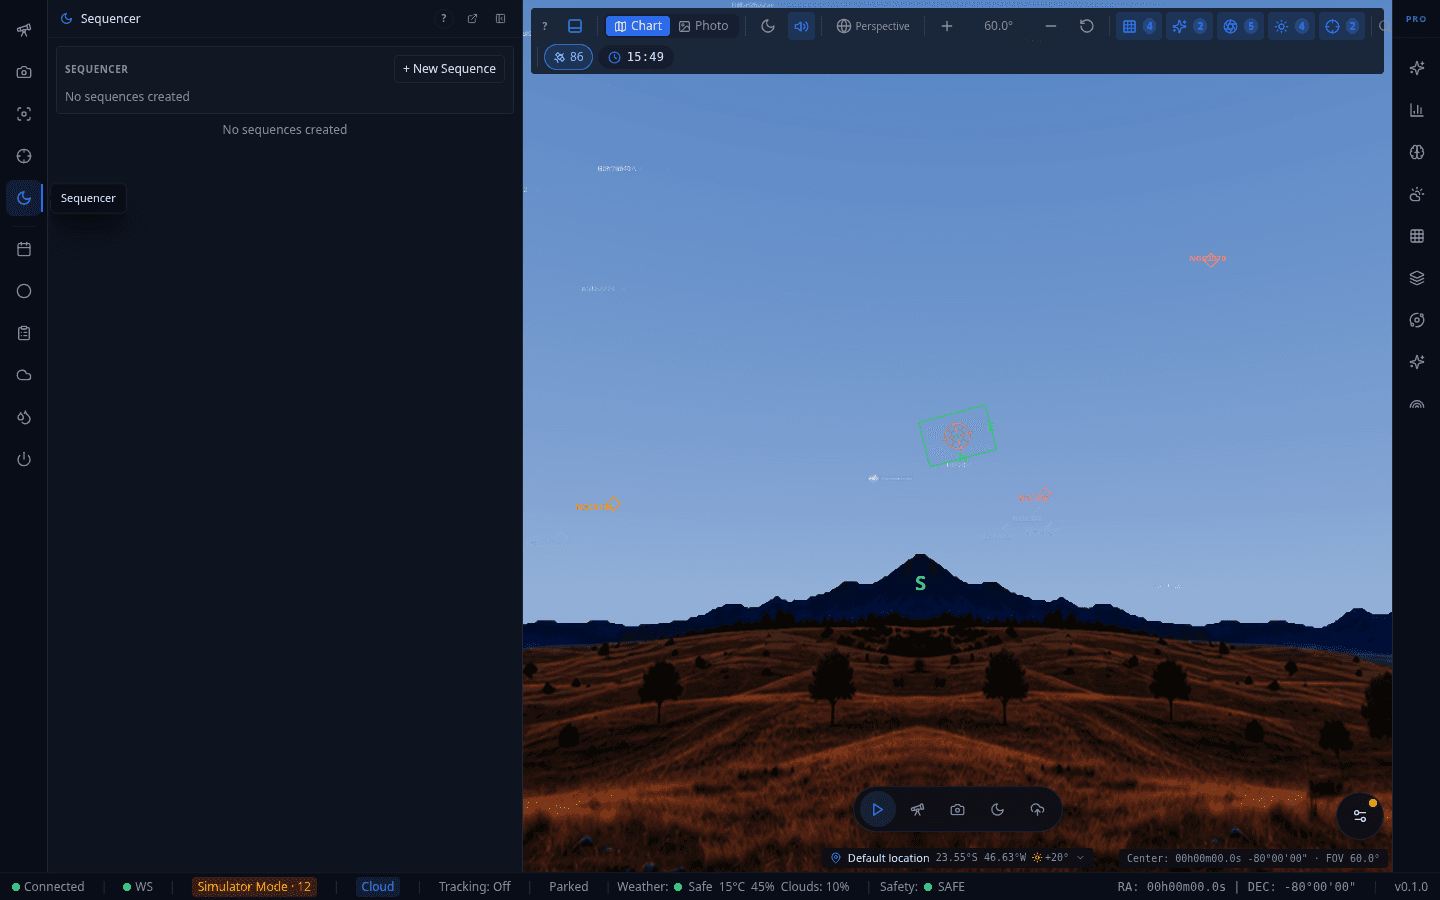
Scheduler
Multi-night target scheduler. Add plans with priority, altitude, and moon constraints; the scheduler computes optimal imaging windows from rise/set/transit times and weather.
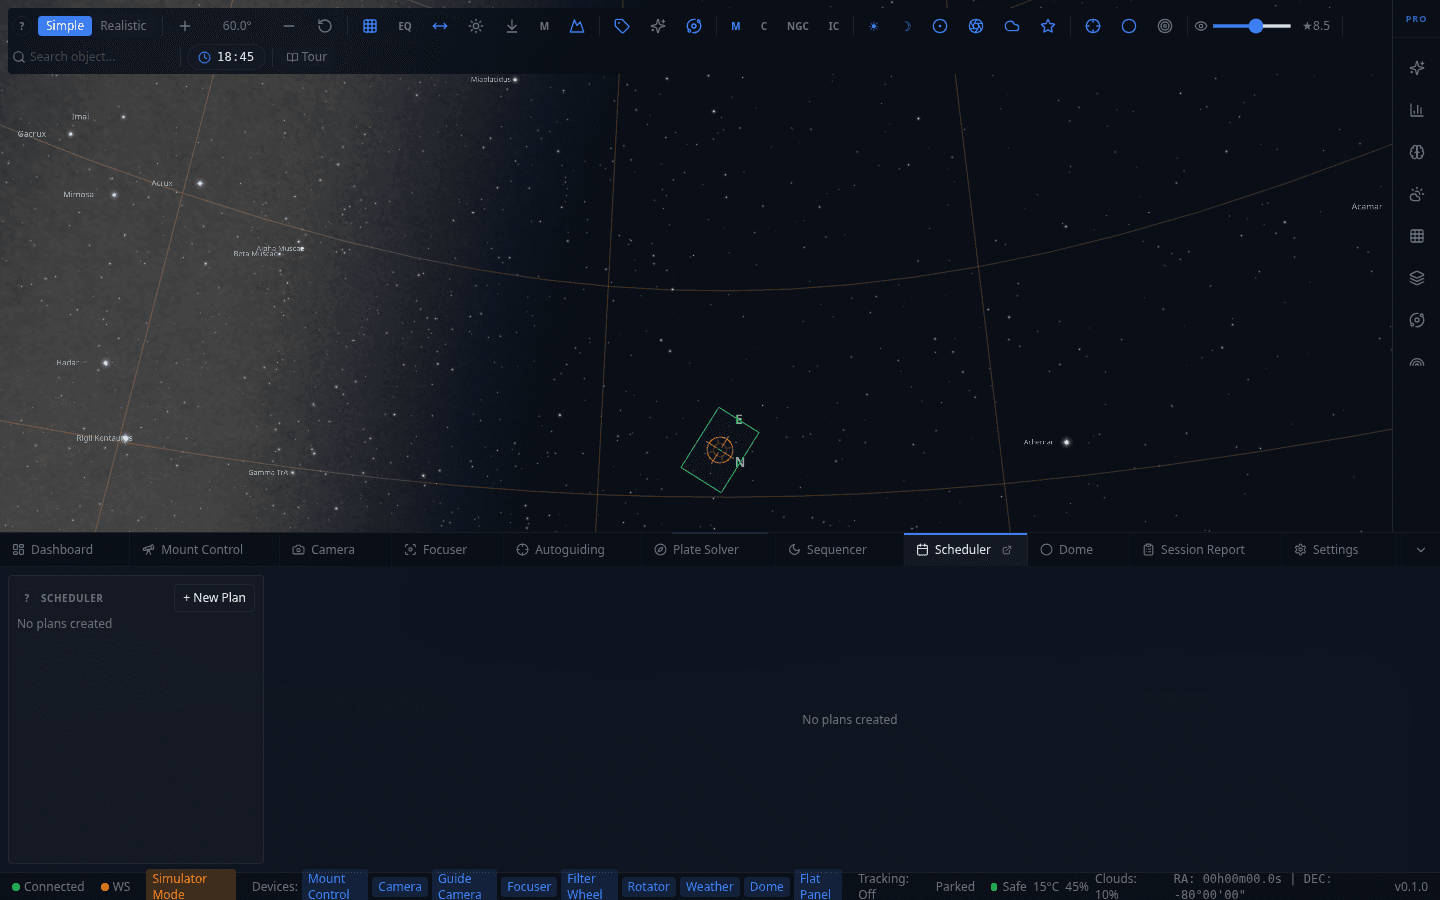
Dome Control
Shutter open/close/park controls, live azimuth readout with a visual compass strip, and a Go To Azimuth field for manual rotation. Auto-sync keeps the dome aligned with the telescope during tracking and GoTo.
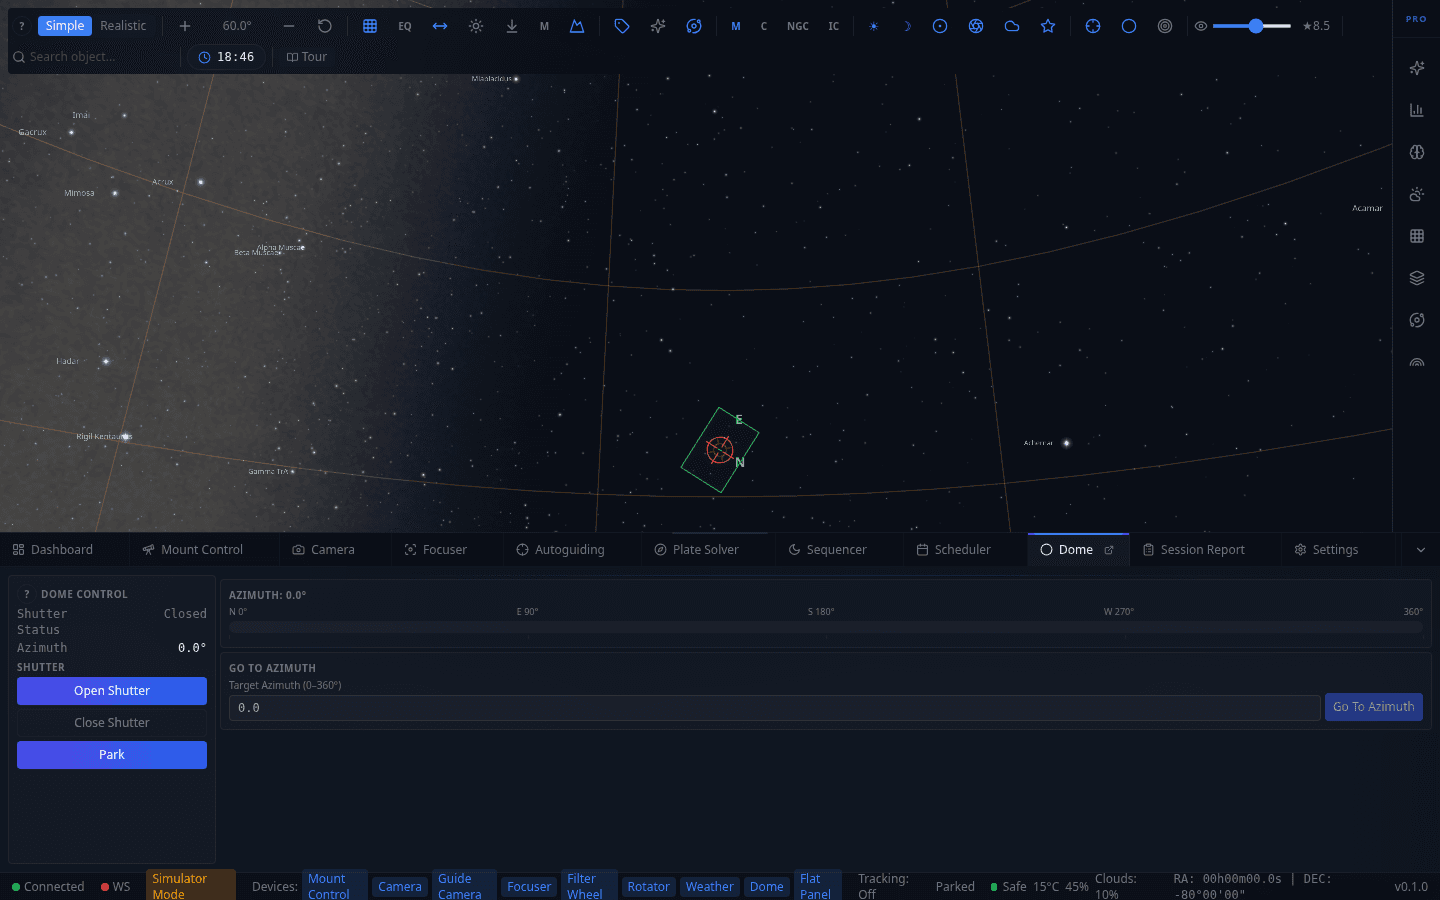
Session Report
Post-session summary panel. Shown here in its empty state — before any session has completed, it surfaces a clear "failed to load report" notice with a technical-details disclosure rather than a silent blank screen. Once a session runs, this populates with captured-frame counts, exposure time, and guiding history.
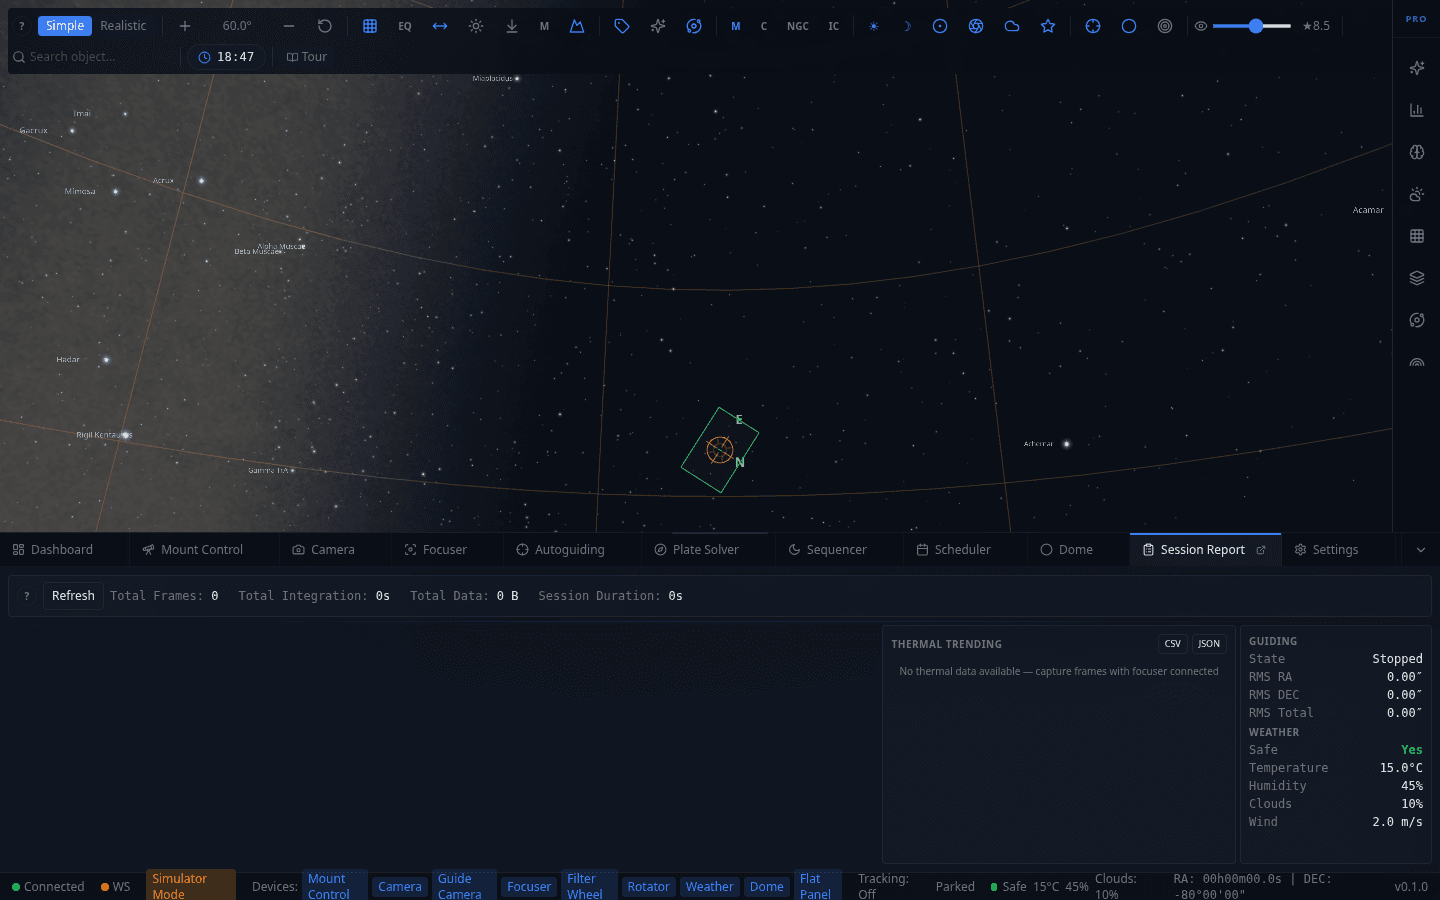
Dew Heater
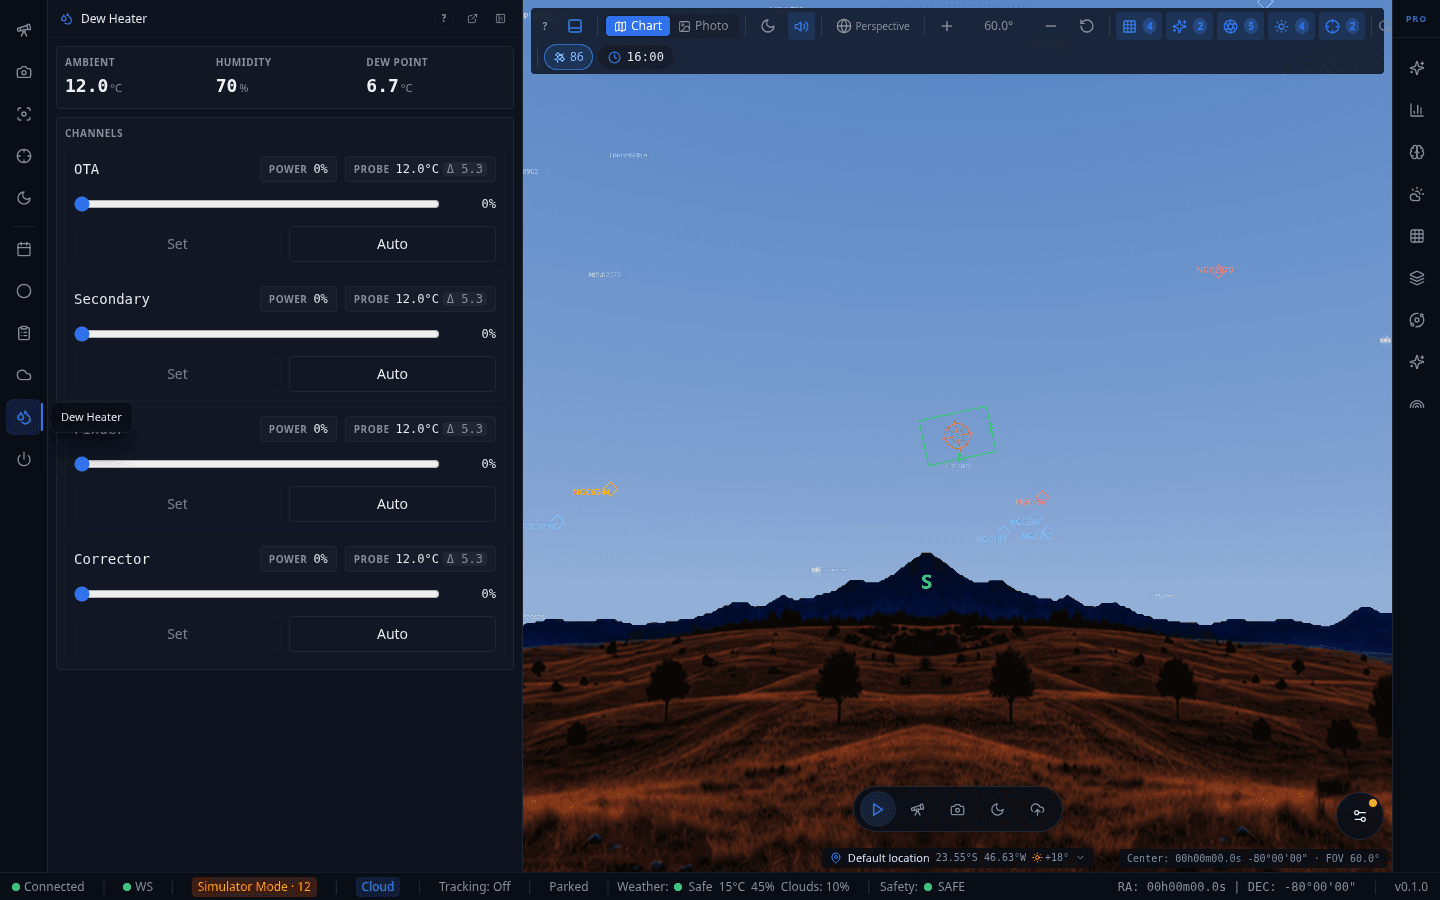
Live ambient temperature, humidity, and dew point at the top. Independent PWM power channels for OTA, Secondary, Finder, and Corrector, each with a probe temperature reading, manual power slider, and an Auto mode that targets a temperature margin above the dew point.
Switch Hub
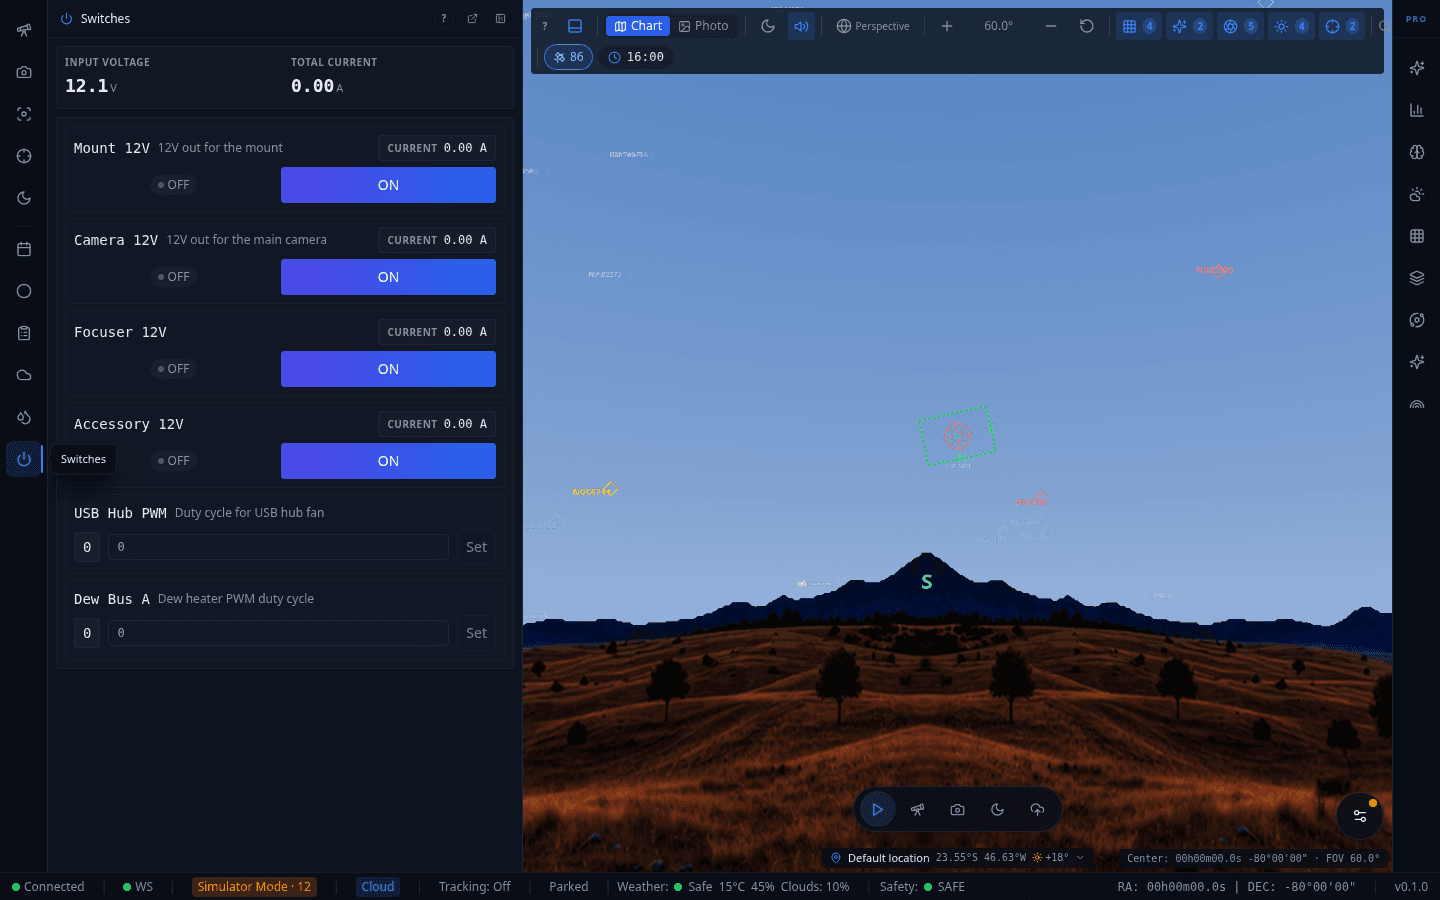
Input voltage and total current at the top. Independent on/off 12V power rails for Mount, Camera, Focuser, and Accessory outputs (each with live current draw), plus PWM duty-cycle controls for a USB hub fan and a second dew heater bus.
Camera Sub-Features
Flat Wizard
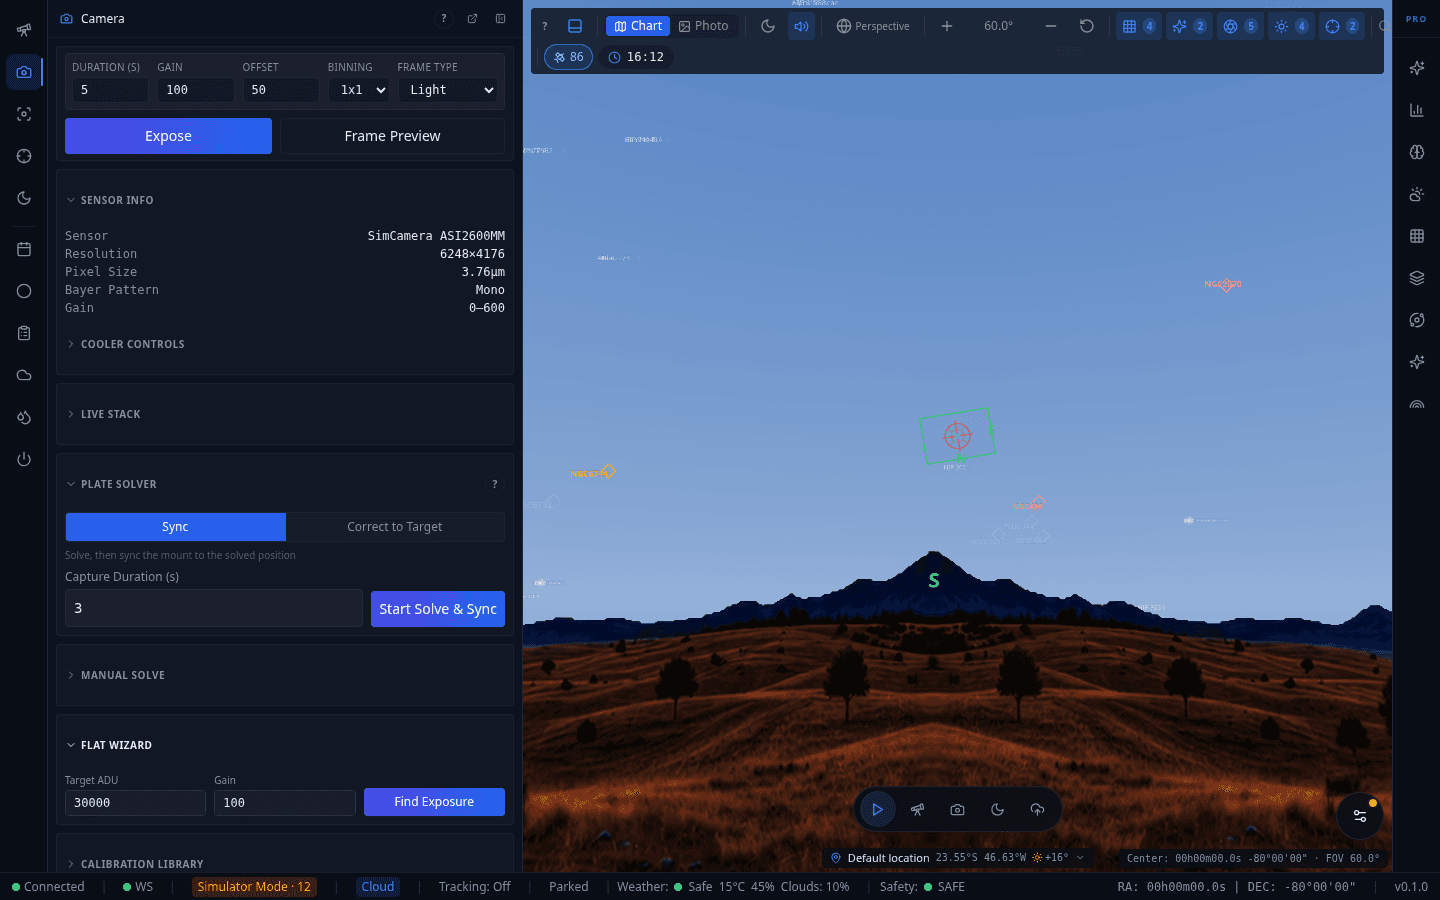
Auto-exposure wizard for capturing flat frames, expanded from within the Camera panel. Iterates exposure time to hit a target ADU level automatically rather than requiring manual trial and error.
Frame History
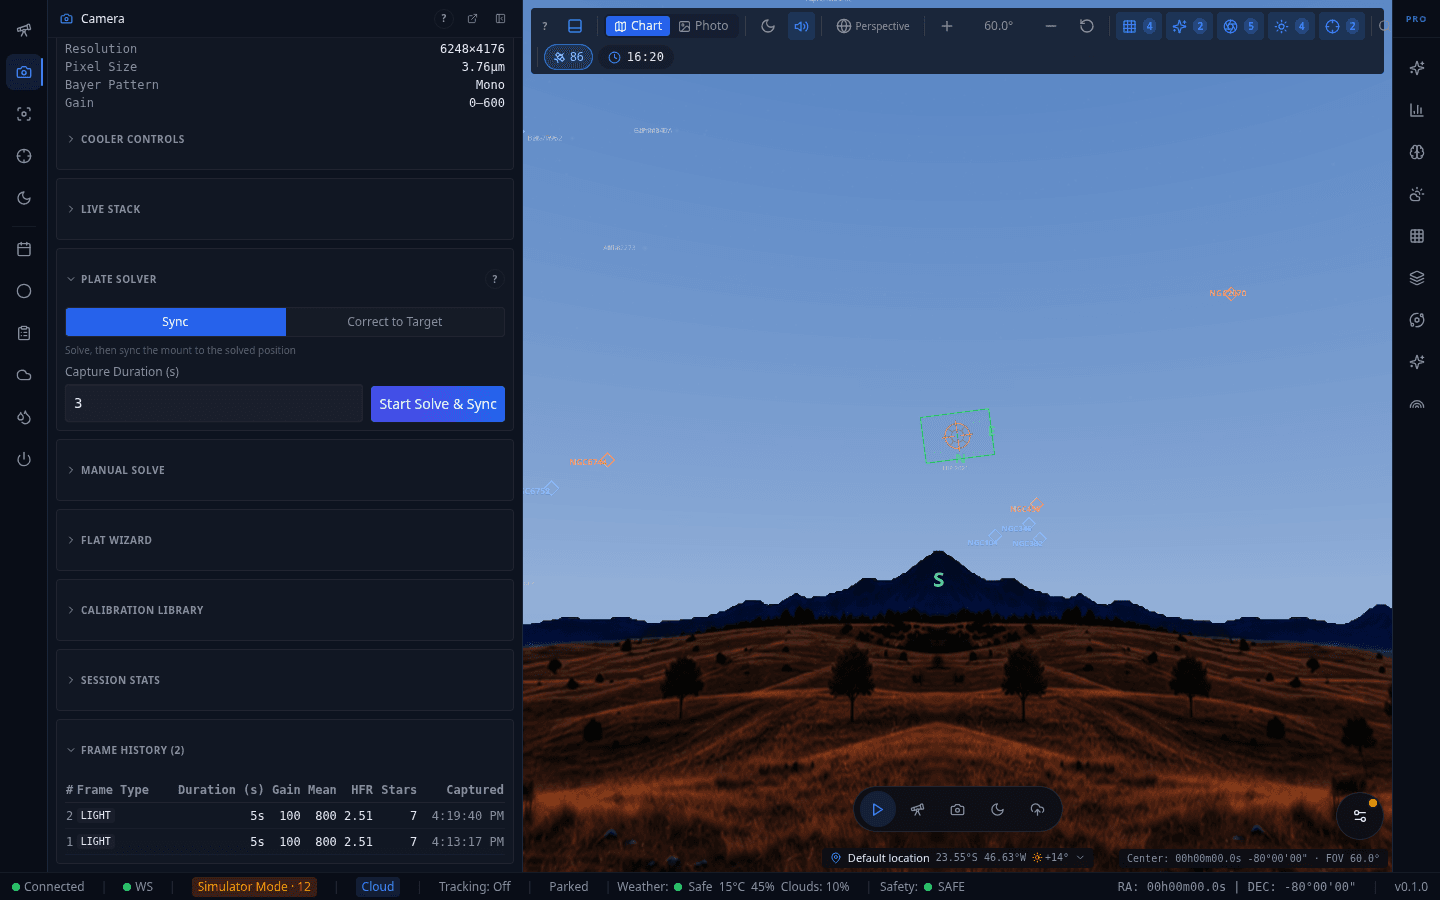
Table of every frame captured this session — type, duration, gain/offset, HFR, star count, and capture time — expanded from the Camera panel's Frame History section. Not pictured: the blink comparator, which needs at least two captured frames of the same target to become available and wasn't reachable in this simulator pass.
Pro Plugins
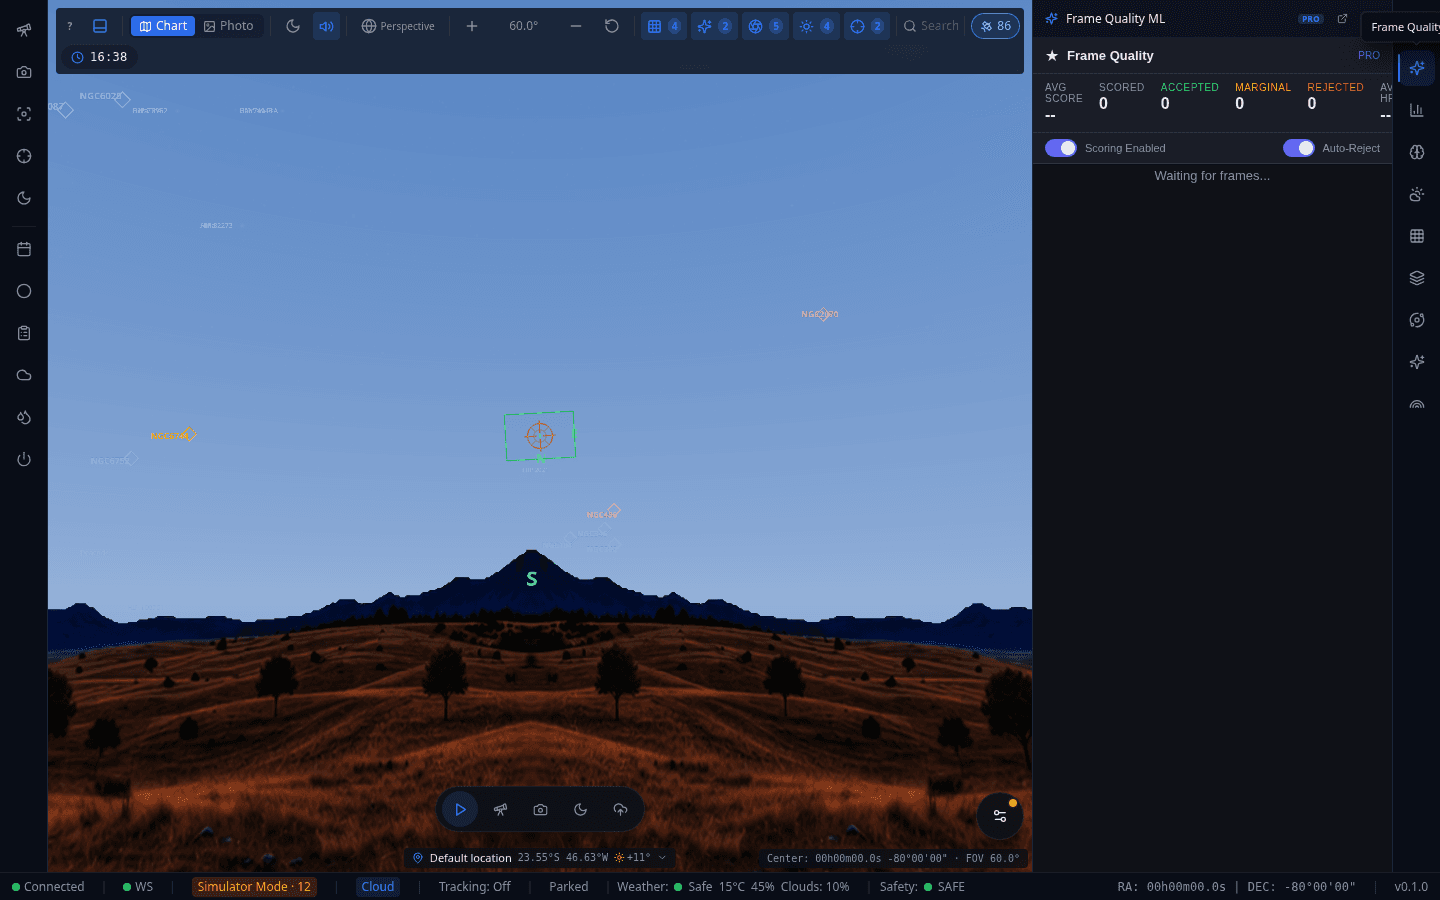
Frame Quality ML
ONNX neural network scoring for every incoming sub-frame — accepted/marginal/rejected counts and average score, with an auto-reject toggle so bad subs (trailing, poor focus, clouds) never make it into your stack.
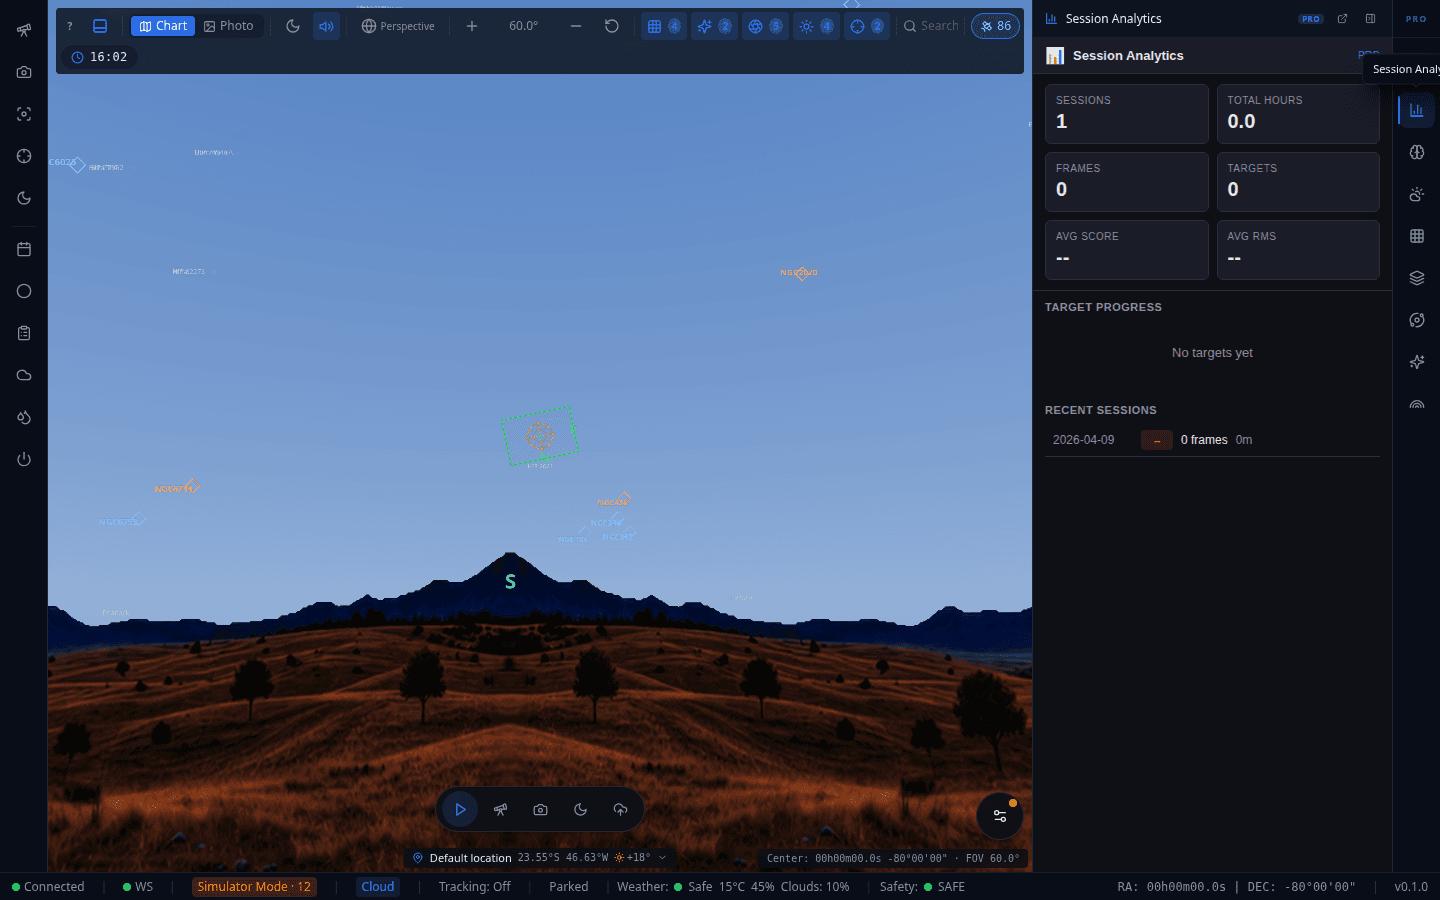
Session Analytics
Multi-night HFR trends, guiding RMS correlation, and temperature drift analysis to track equipment performance across sessions rather than just one night at a time.
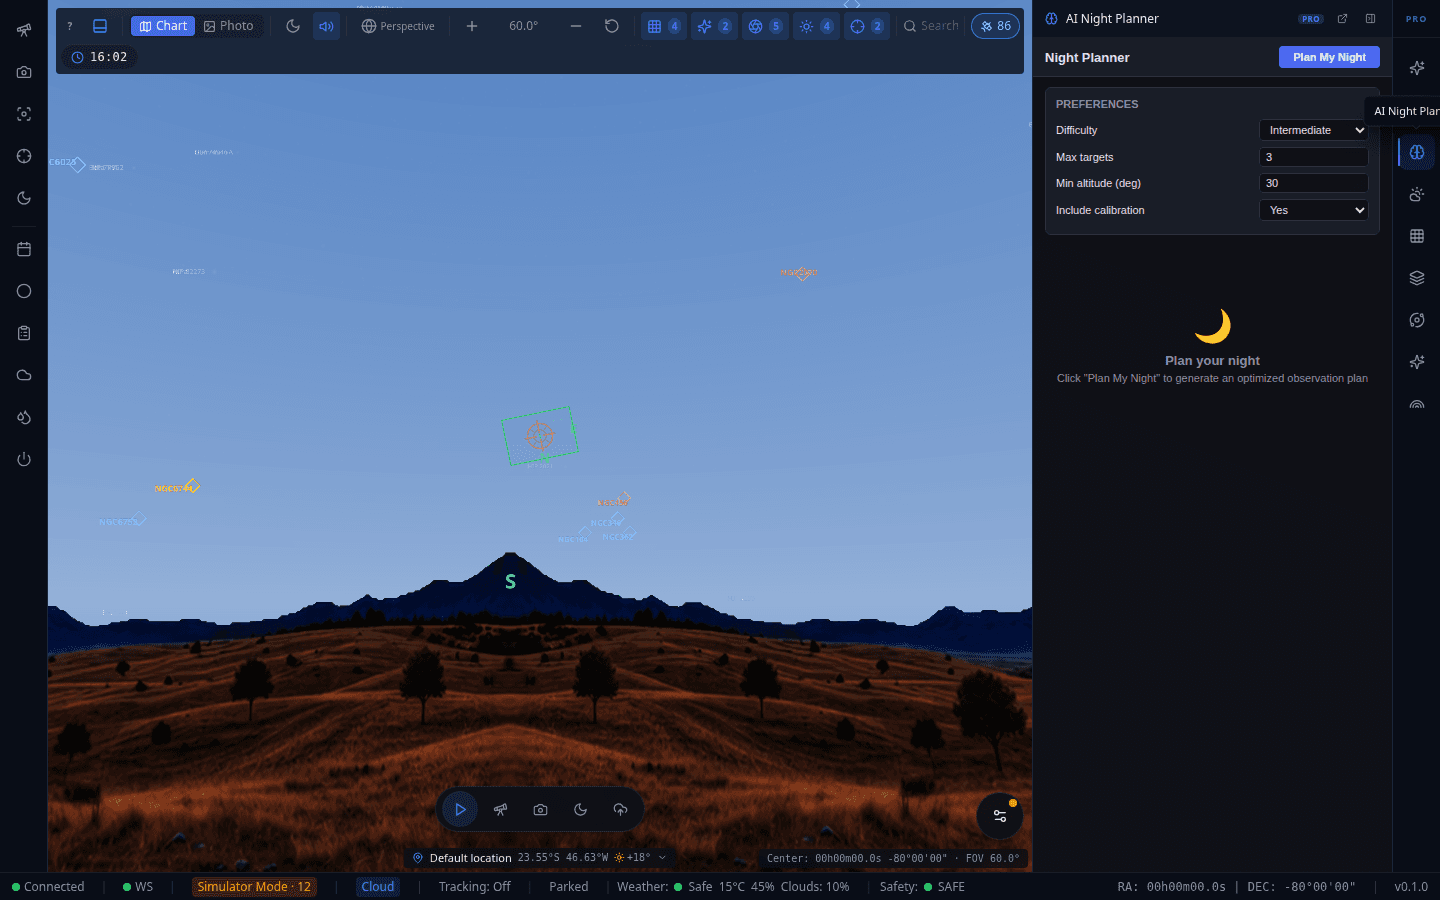
AI Night Planner
LLM-powered planner that generates an optimal target sequence for the night, factoring in moon phase, seeing, and altitude windows.
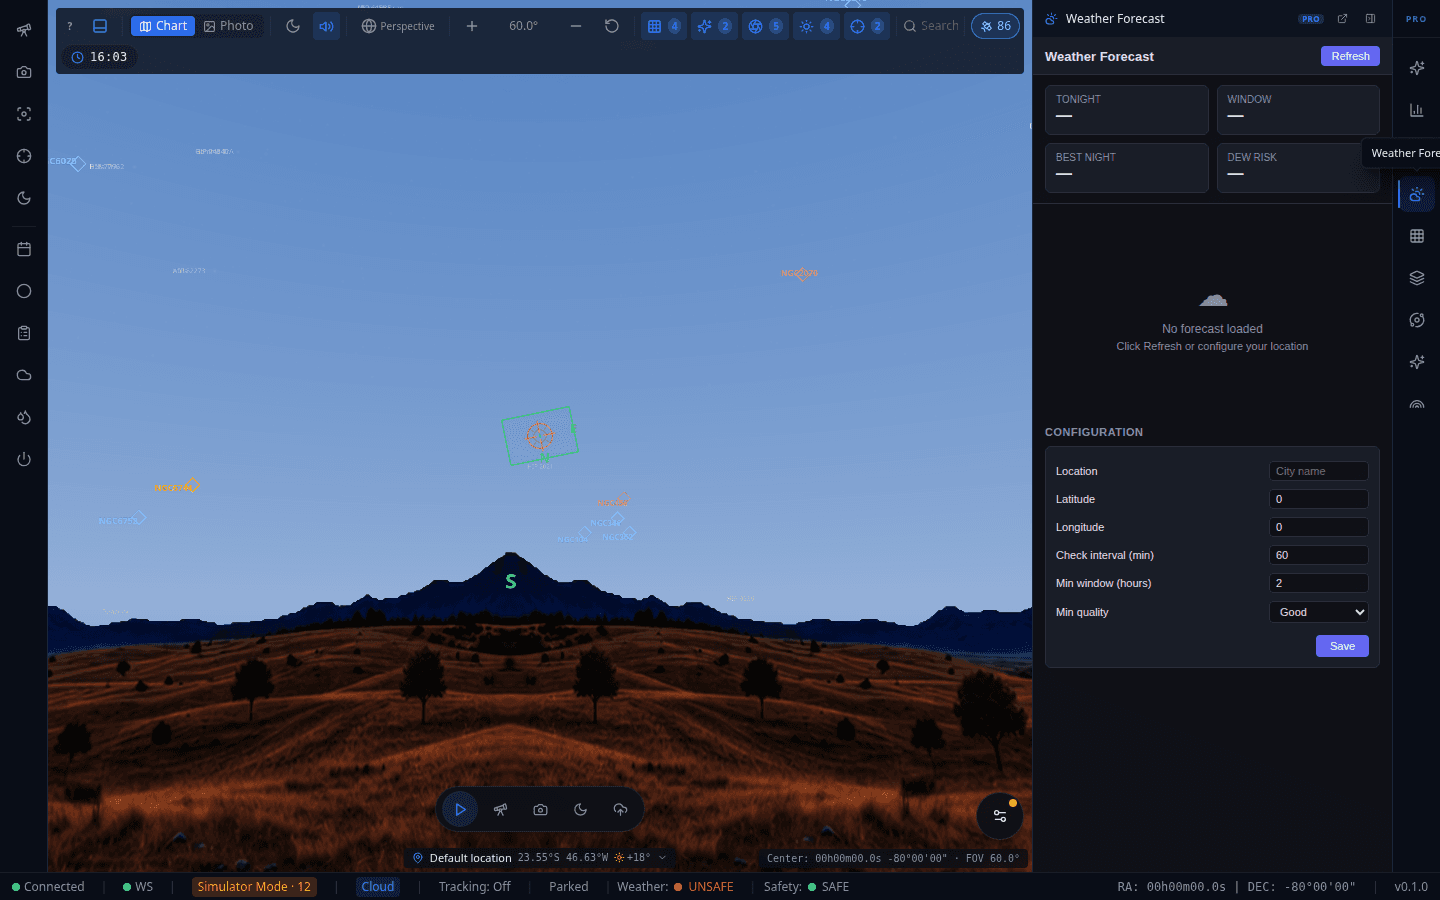
Weather Forecast
72-hour weather forecast via Open-Meteo with clear-sky window alerts, dew/frost risk warnings, and satellite-pass notifications.
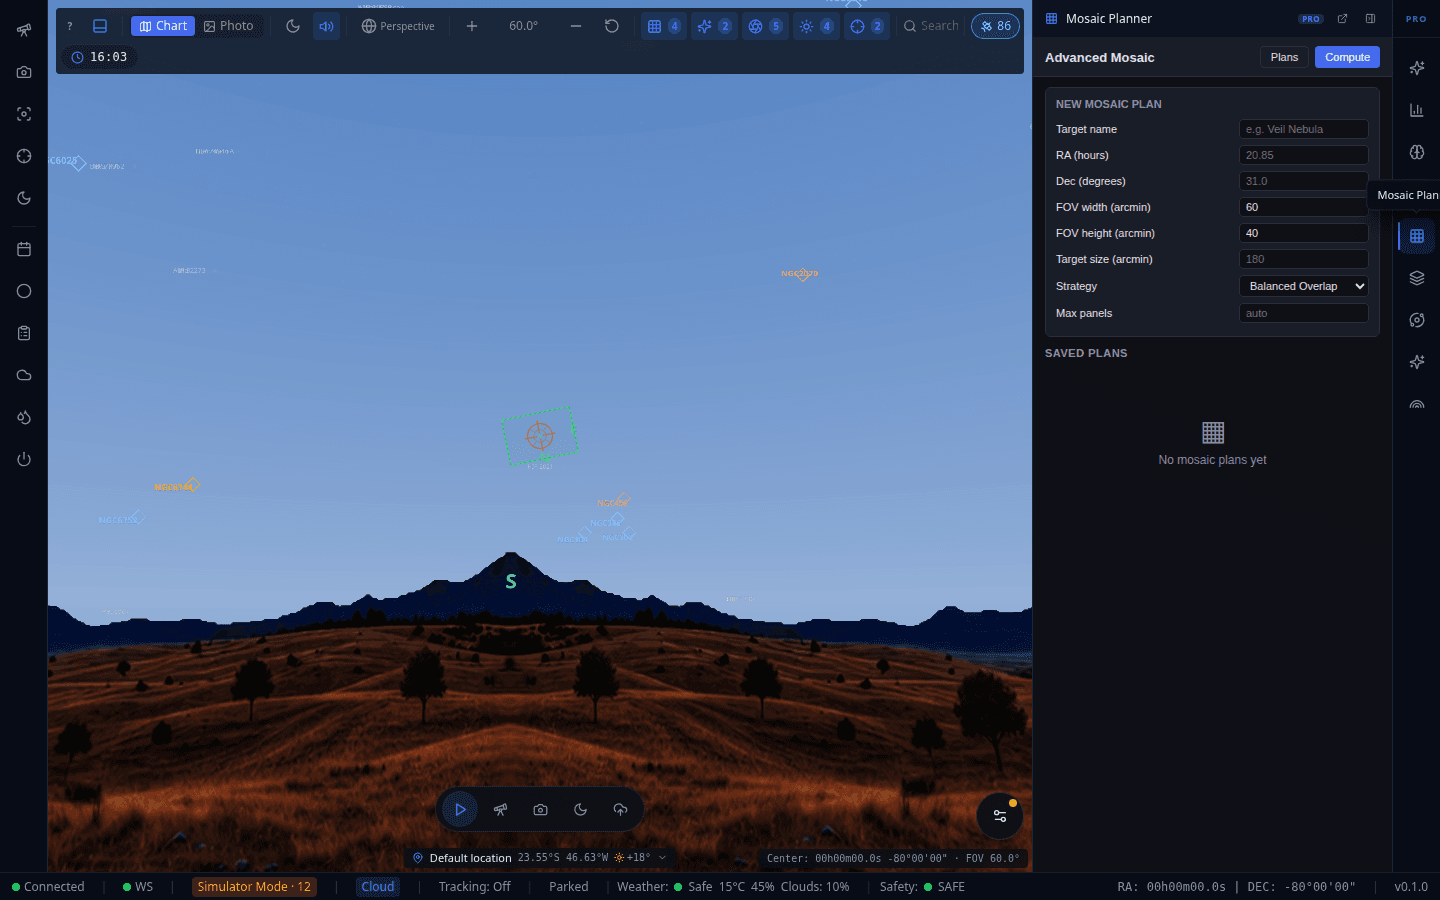
Mosaic Planner
Multi-panel mosaic planning: target name, RA/Dec, FOV width/height, target size, tiling strategy, and max panel count, with computed plans saved for later capture.
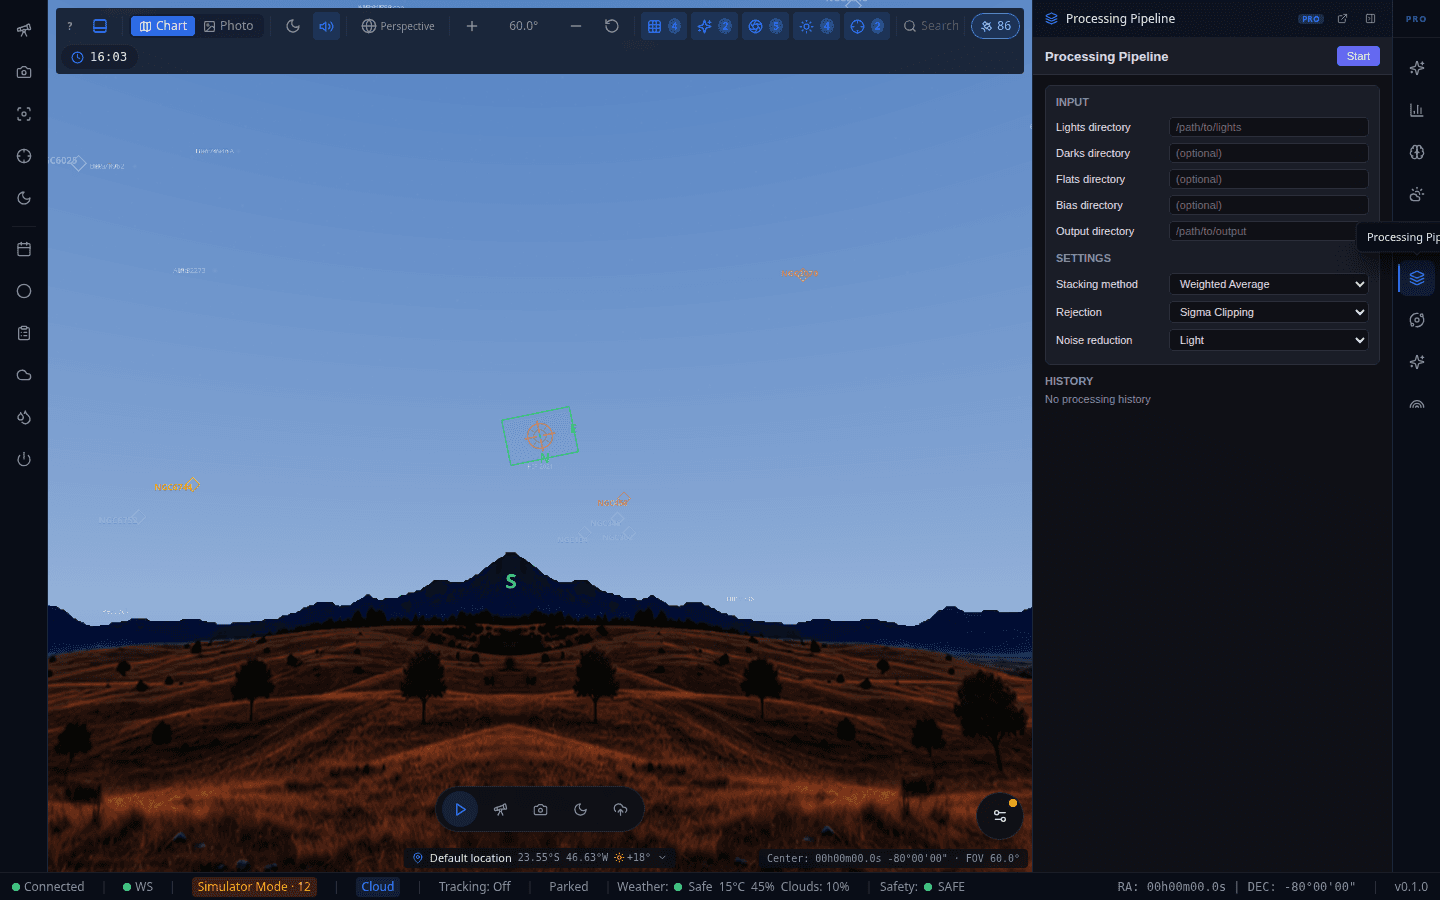
Processing Pipeline
Built-in calibration and stacking pipeline — dark/flat matching, sigma-clip rejection, gradient removal, and color balance — without leaving OpenSkyLab.
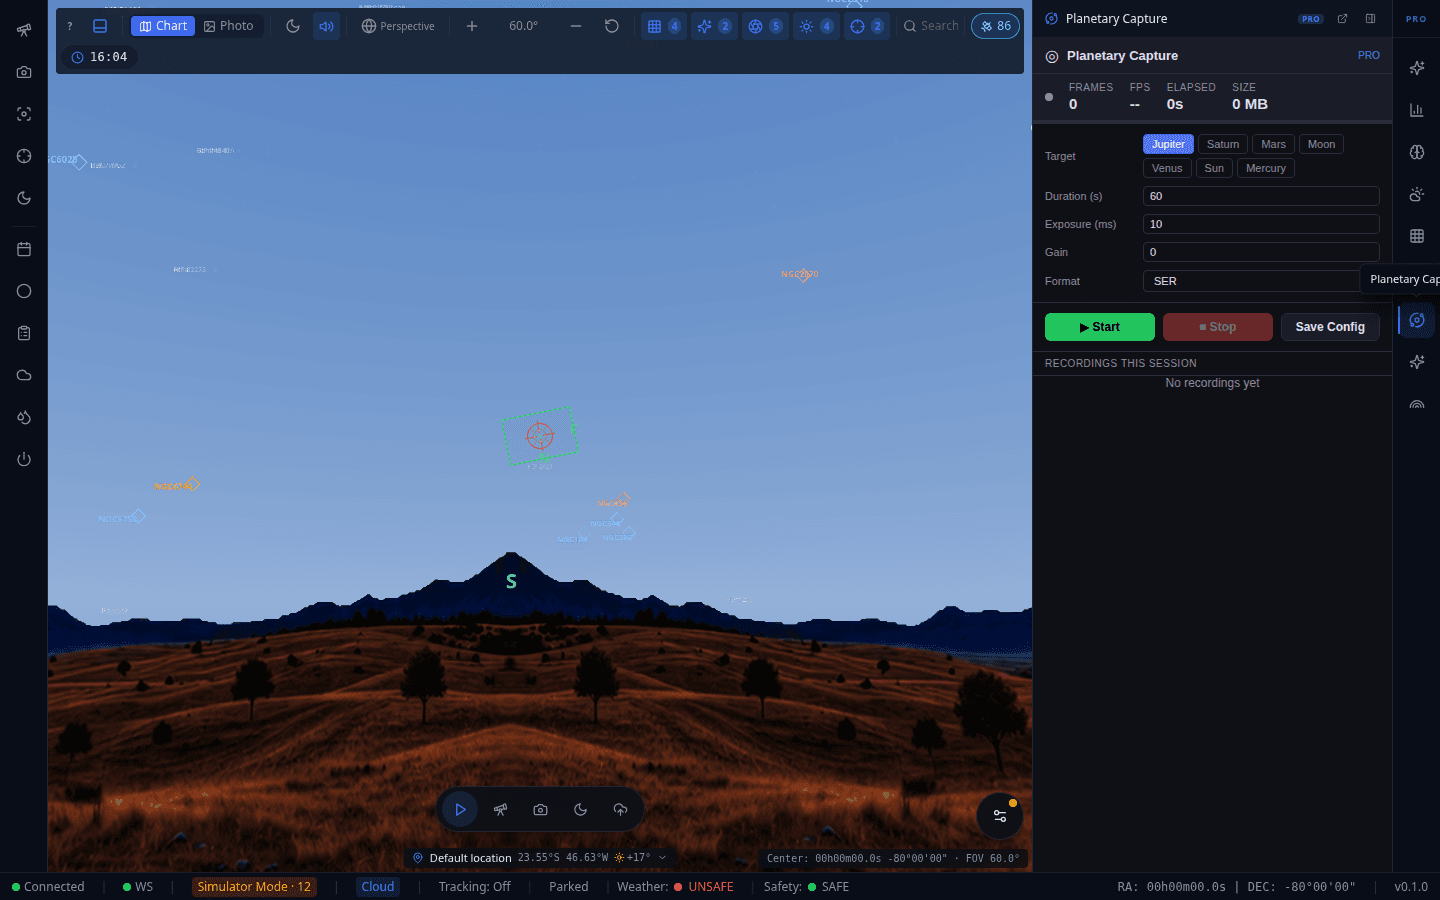
Planetary Capture
SER-format video capture tuned for planetary, lunar, and solar imaging, with high-speed frame acquisition.
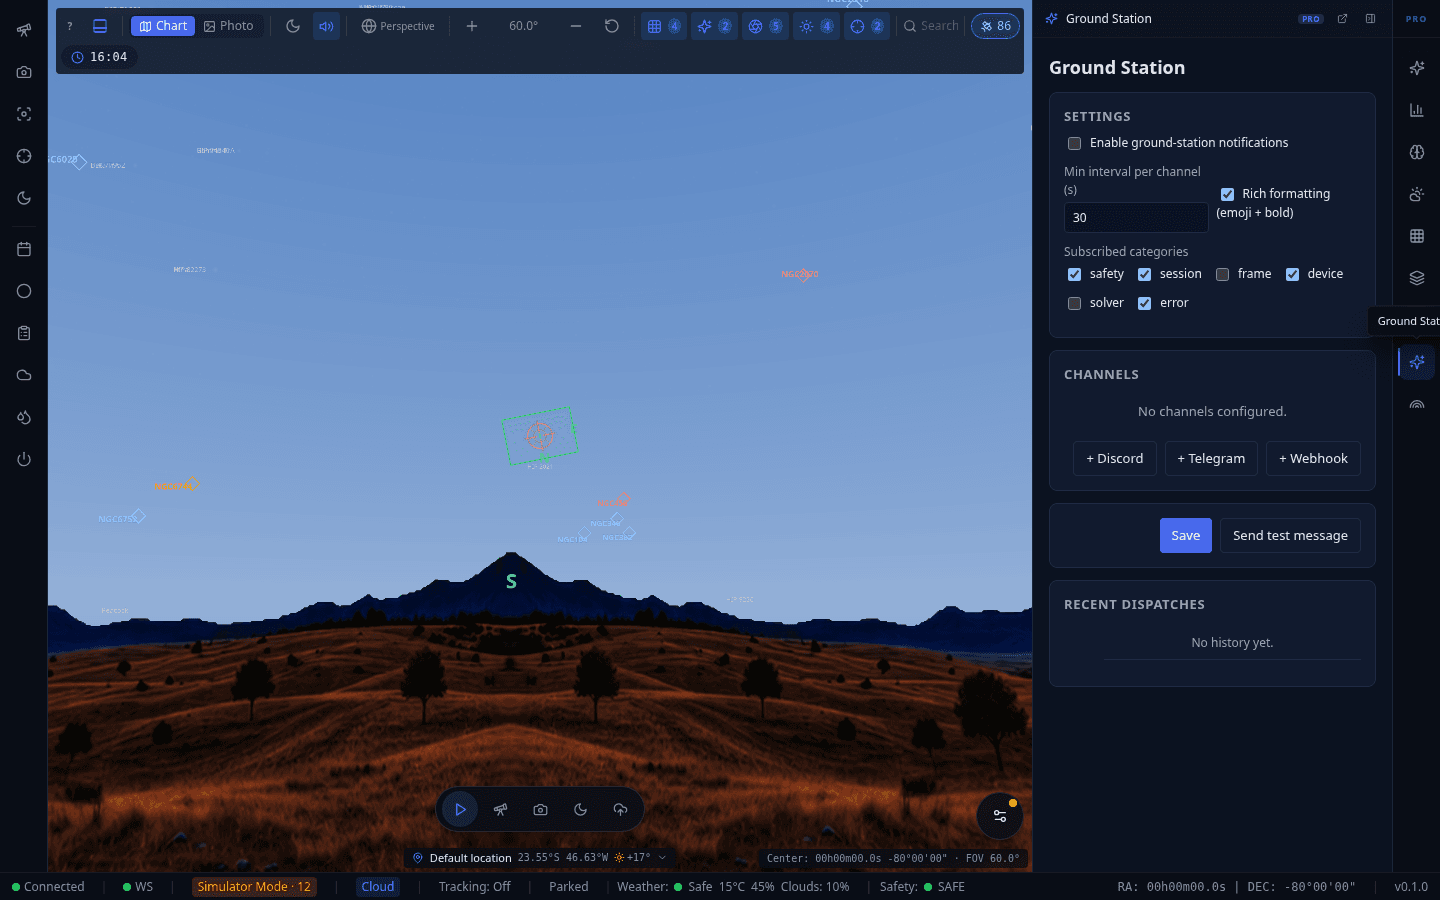
Ground Station (Relay)
Secure WSS tunnel for controlling your rig remotely from anywhere, with no port forwarding required and multi-client support.
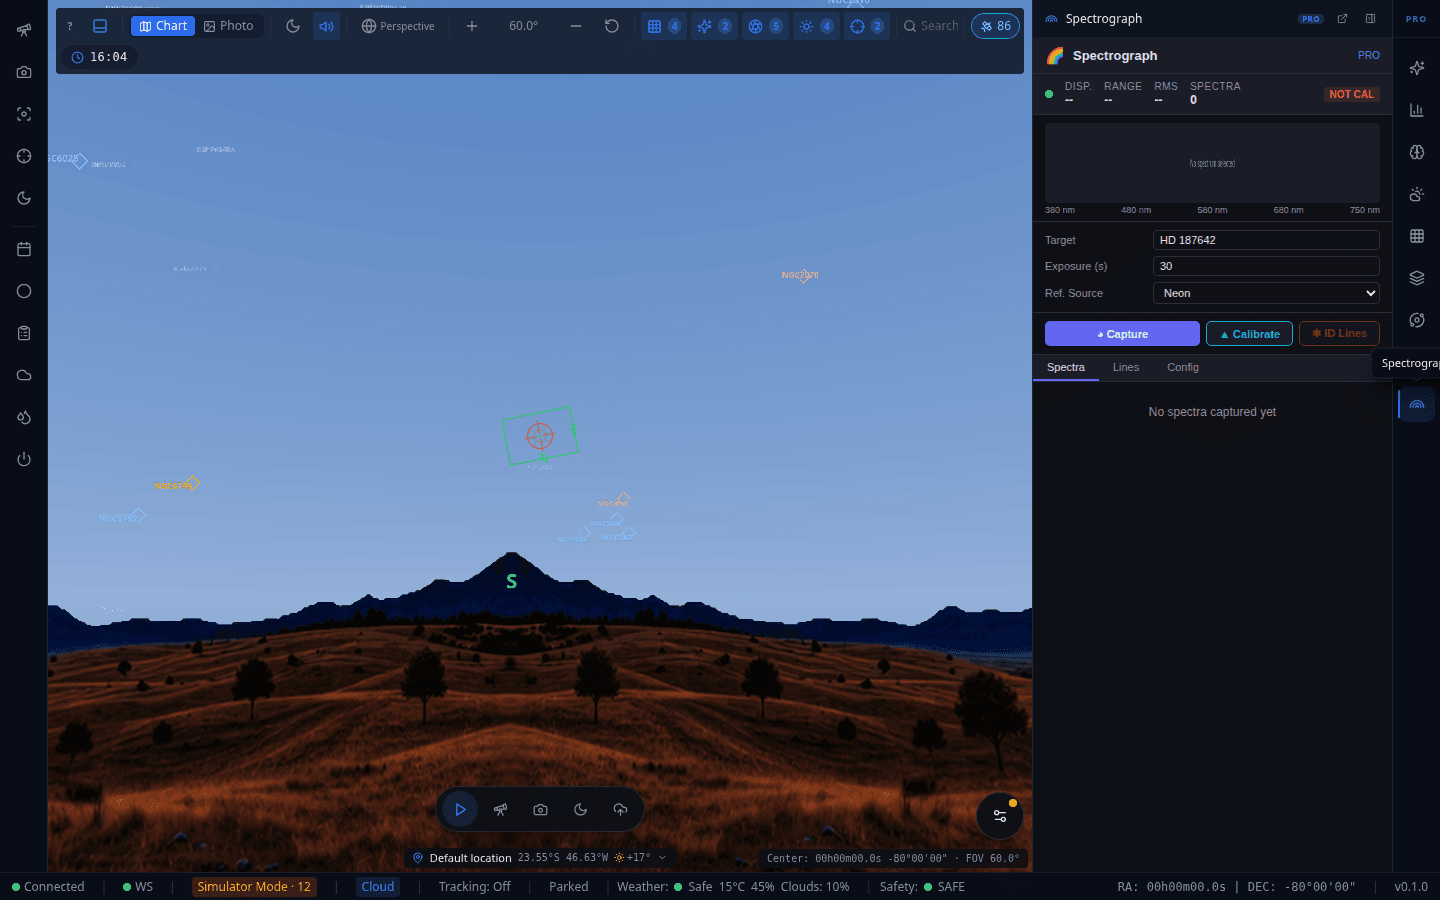
Spectrograph
Dedicated spectrograph capture UI with calibration, wavelength mapping, and emission/absorption profile fitting.
Settings
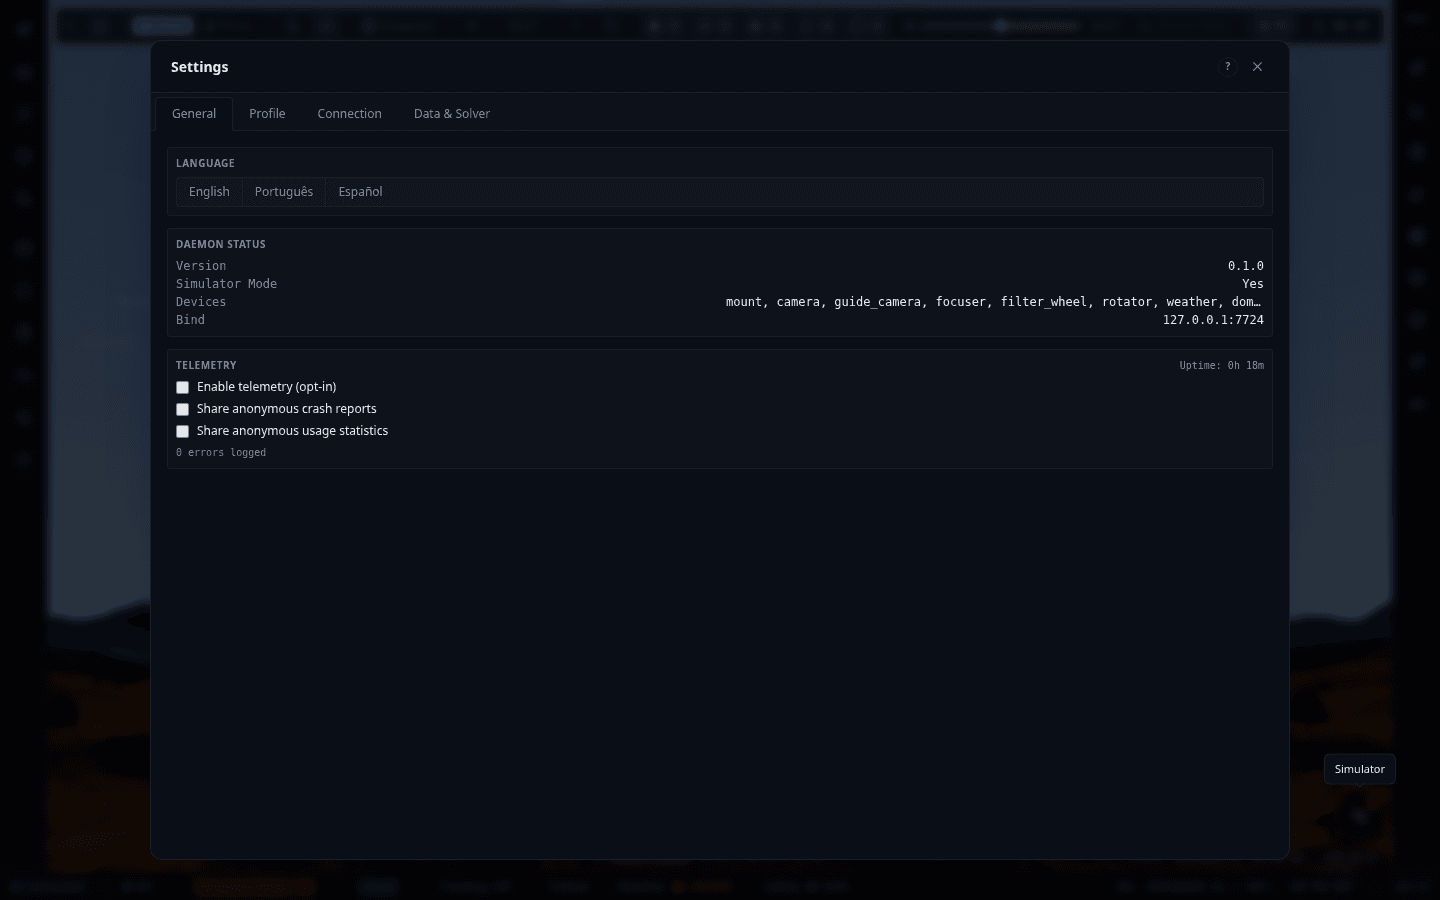
Settings — General
Opened from the "+" menu. Language switcher, live daemon status (version, simulator mode, connected devices, bind address), and telemetry opt-in controls, all in one tabbed dialog alongside Profile, Connection, and Data & Solver.
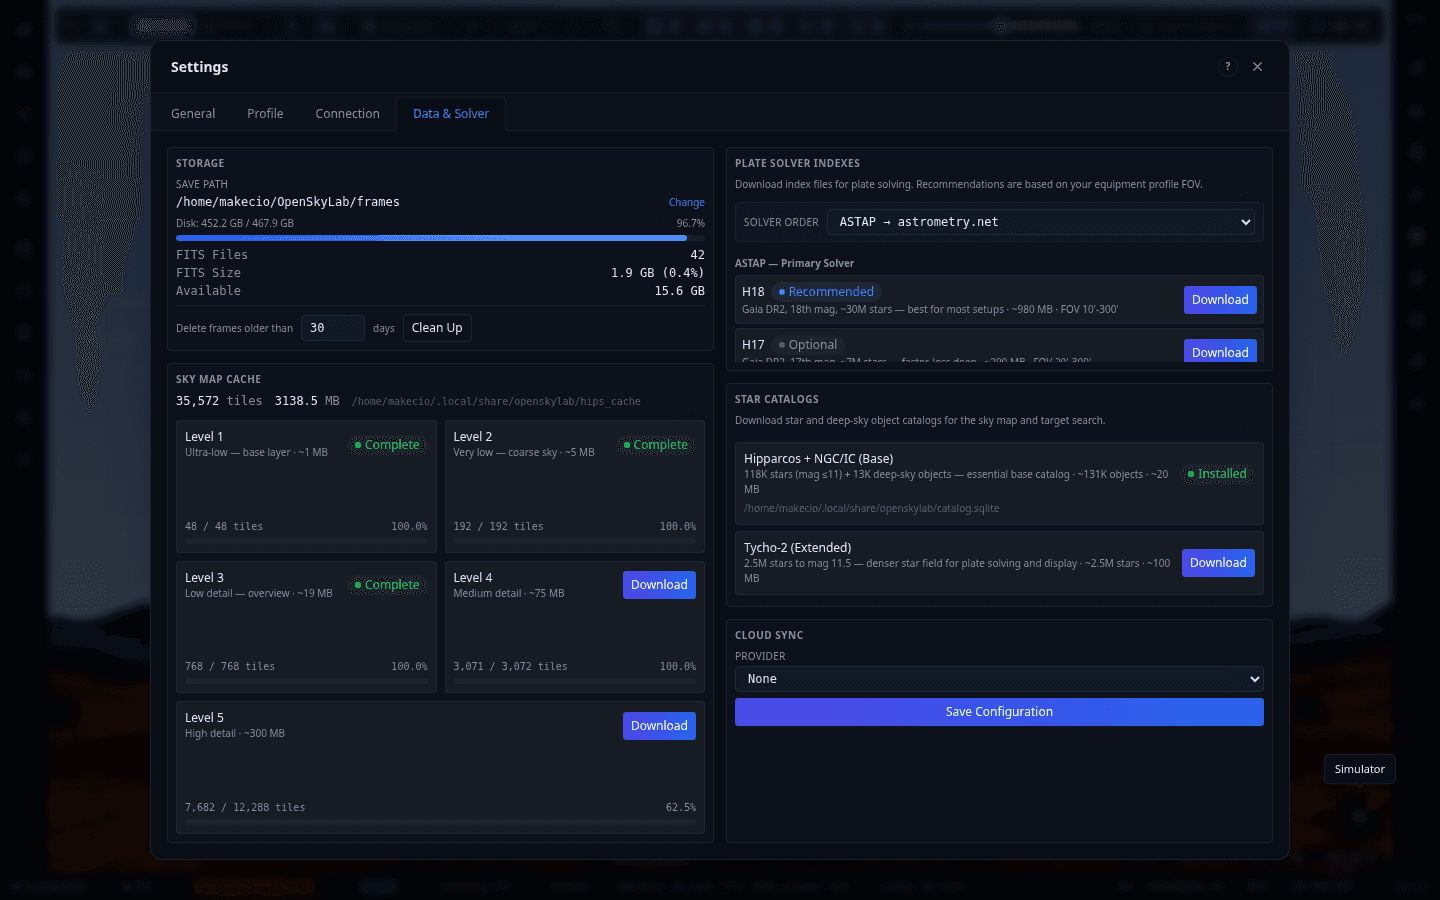
Data & Solver — Sky Cache, Solver Indexes, Catalogs
Storage usage and cleanup for saved FITS frames; the HiPS Sky Map Cache with per-level (L1–L5) tile counts and download progress for offline sky imagery; ASTAP/astrometry.net plate-solver index downloads; star/DSO catalog downloads; and the Cloud Sync provider selector.
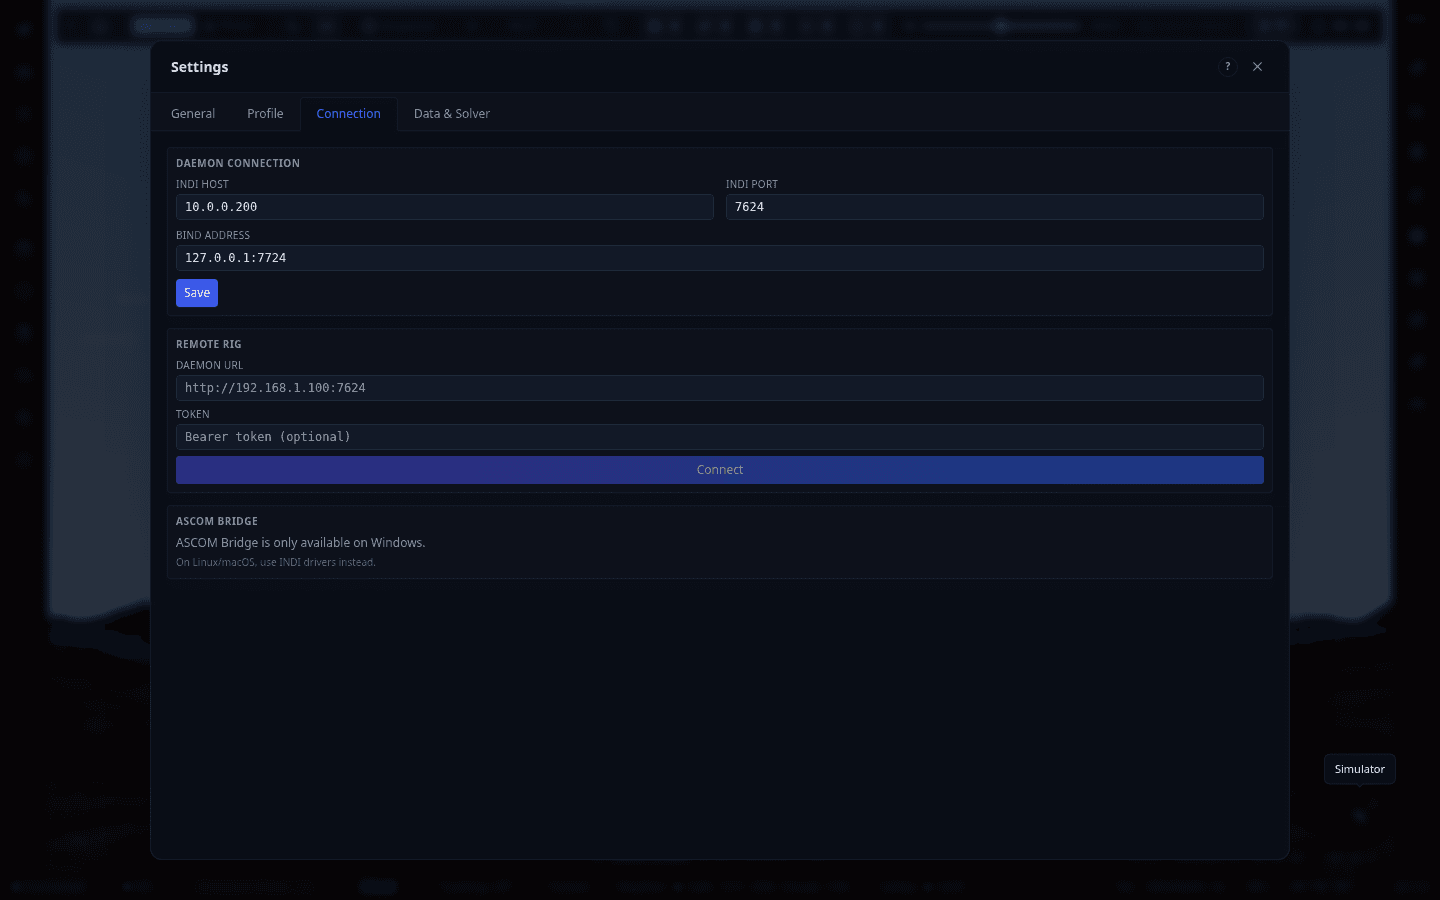
Connection — Daemon, Remote Rig, ASCOM Bridge
Daemon connection (INDI host/port, bind address), Remote Rig setup for controlling a daemon over the network with an optional bearer token, and the ASCOM Bridge section — which correctly reports itself as Windows-only and points Linux/macOS users to INDI drivers instead.
Actions & Dialogs
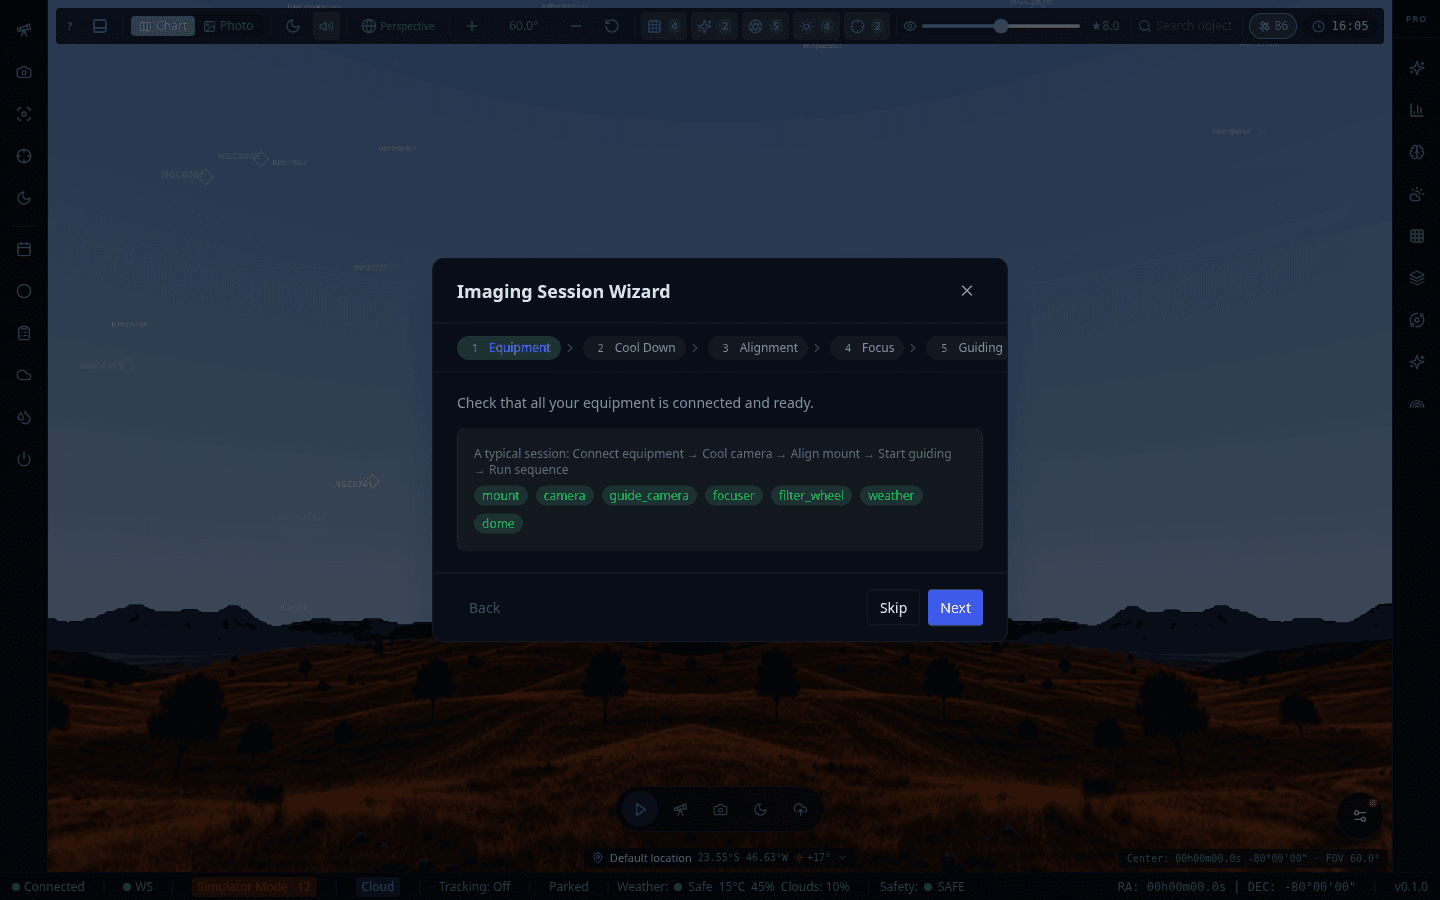
Imaging Session Wizard
Step-by-step guided session setup — Equipment, Cool Down, Alignment, Focus, and Guiding stages — with a quick reference for the typical workflow (connect → cool → align → guide → sequence) and live per-device readiness tags.
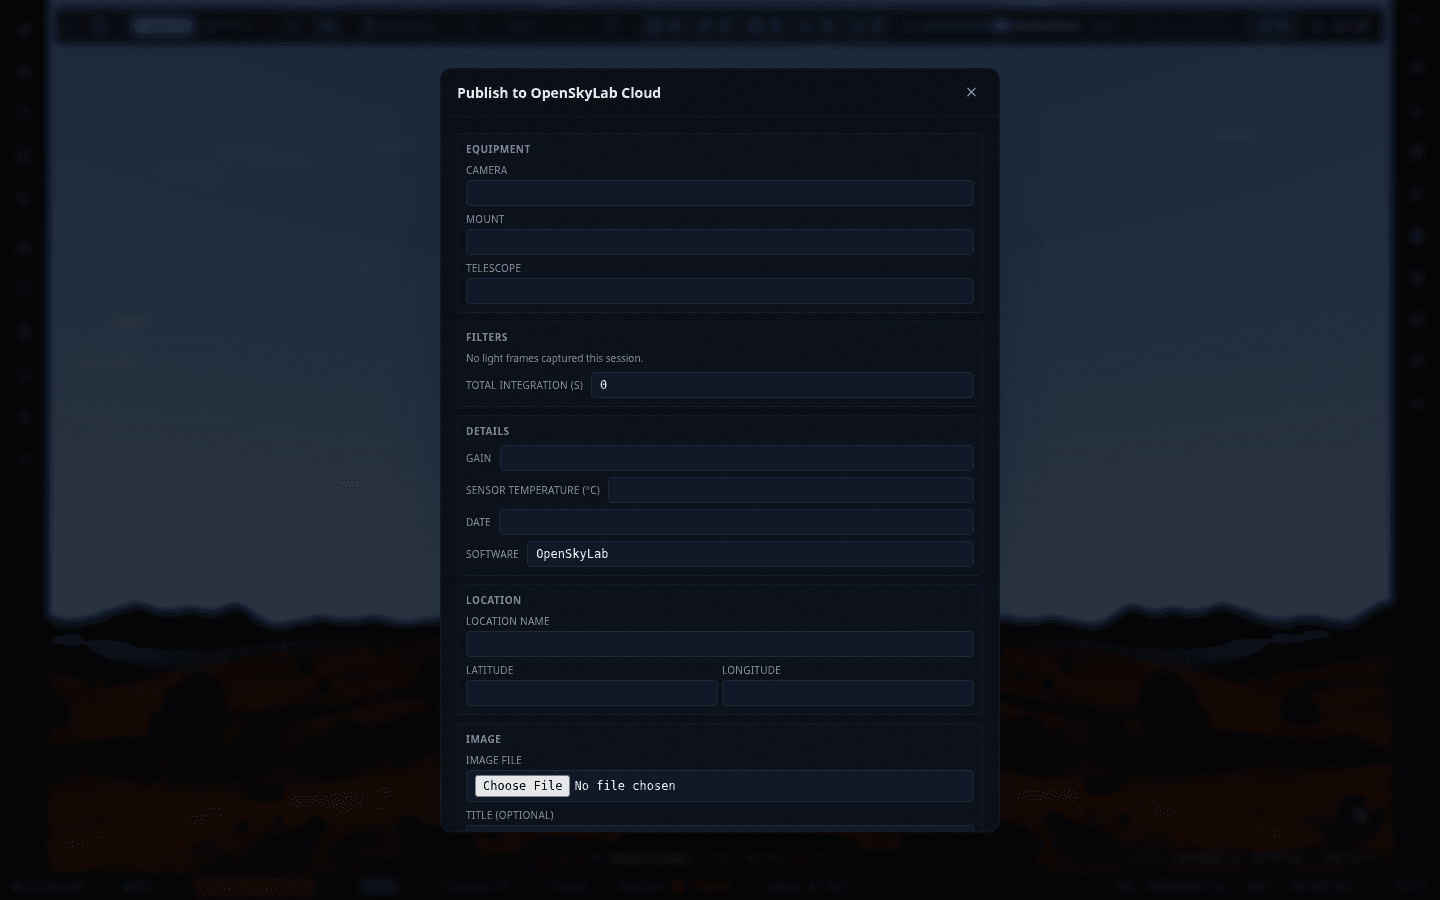
Publish to Cloud
AstroBin-style publish form for sharing a captured image: equipment (camera/mount/telescope), filters and total integration time, capture details (gain, sensor temperature, date), location, and the image file itself.
Interface Elements
Contextual Help
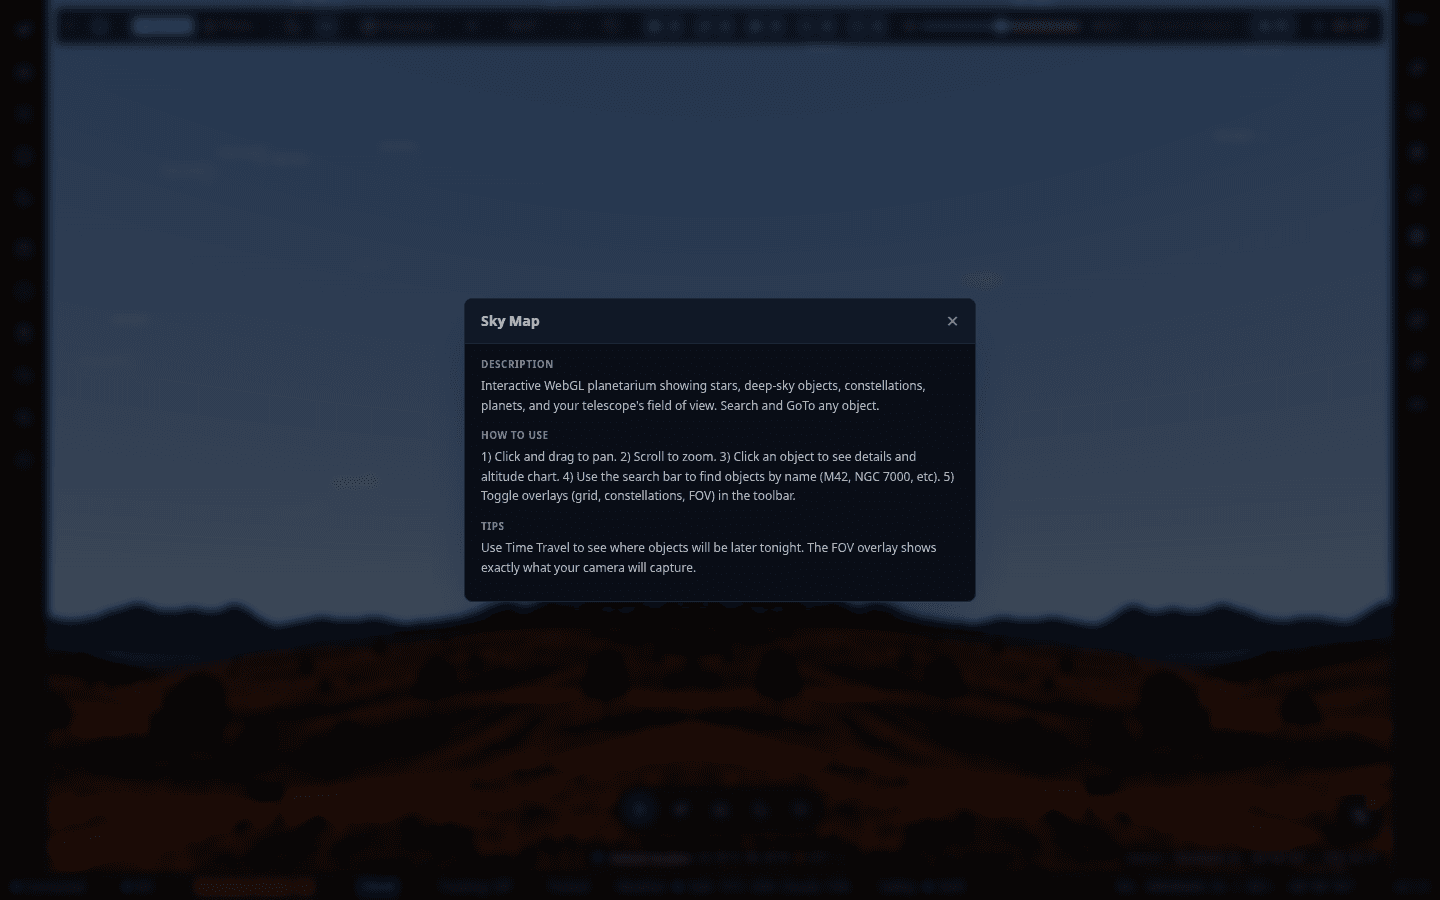
Every panel has a "?" button opening an inline Description / How To Use / Tips popover scoped to that panel — shown here for the Sky Map. This is the app's per-panel help, distinct from the guided onboarding tour offered on first launch.